Blogg

Blogg

måndag 12 december 2022

Icy wreath

Hello and welcome, 

When I saw the Tim Holtz CMS458 Department store stamp set, I knew I had to have it. I love to color stamped images and this set welcomes you to do so. 

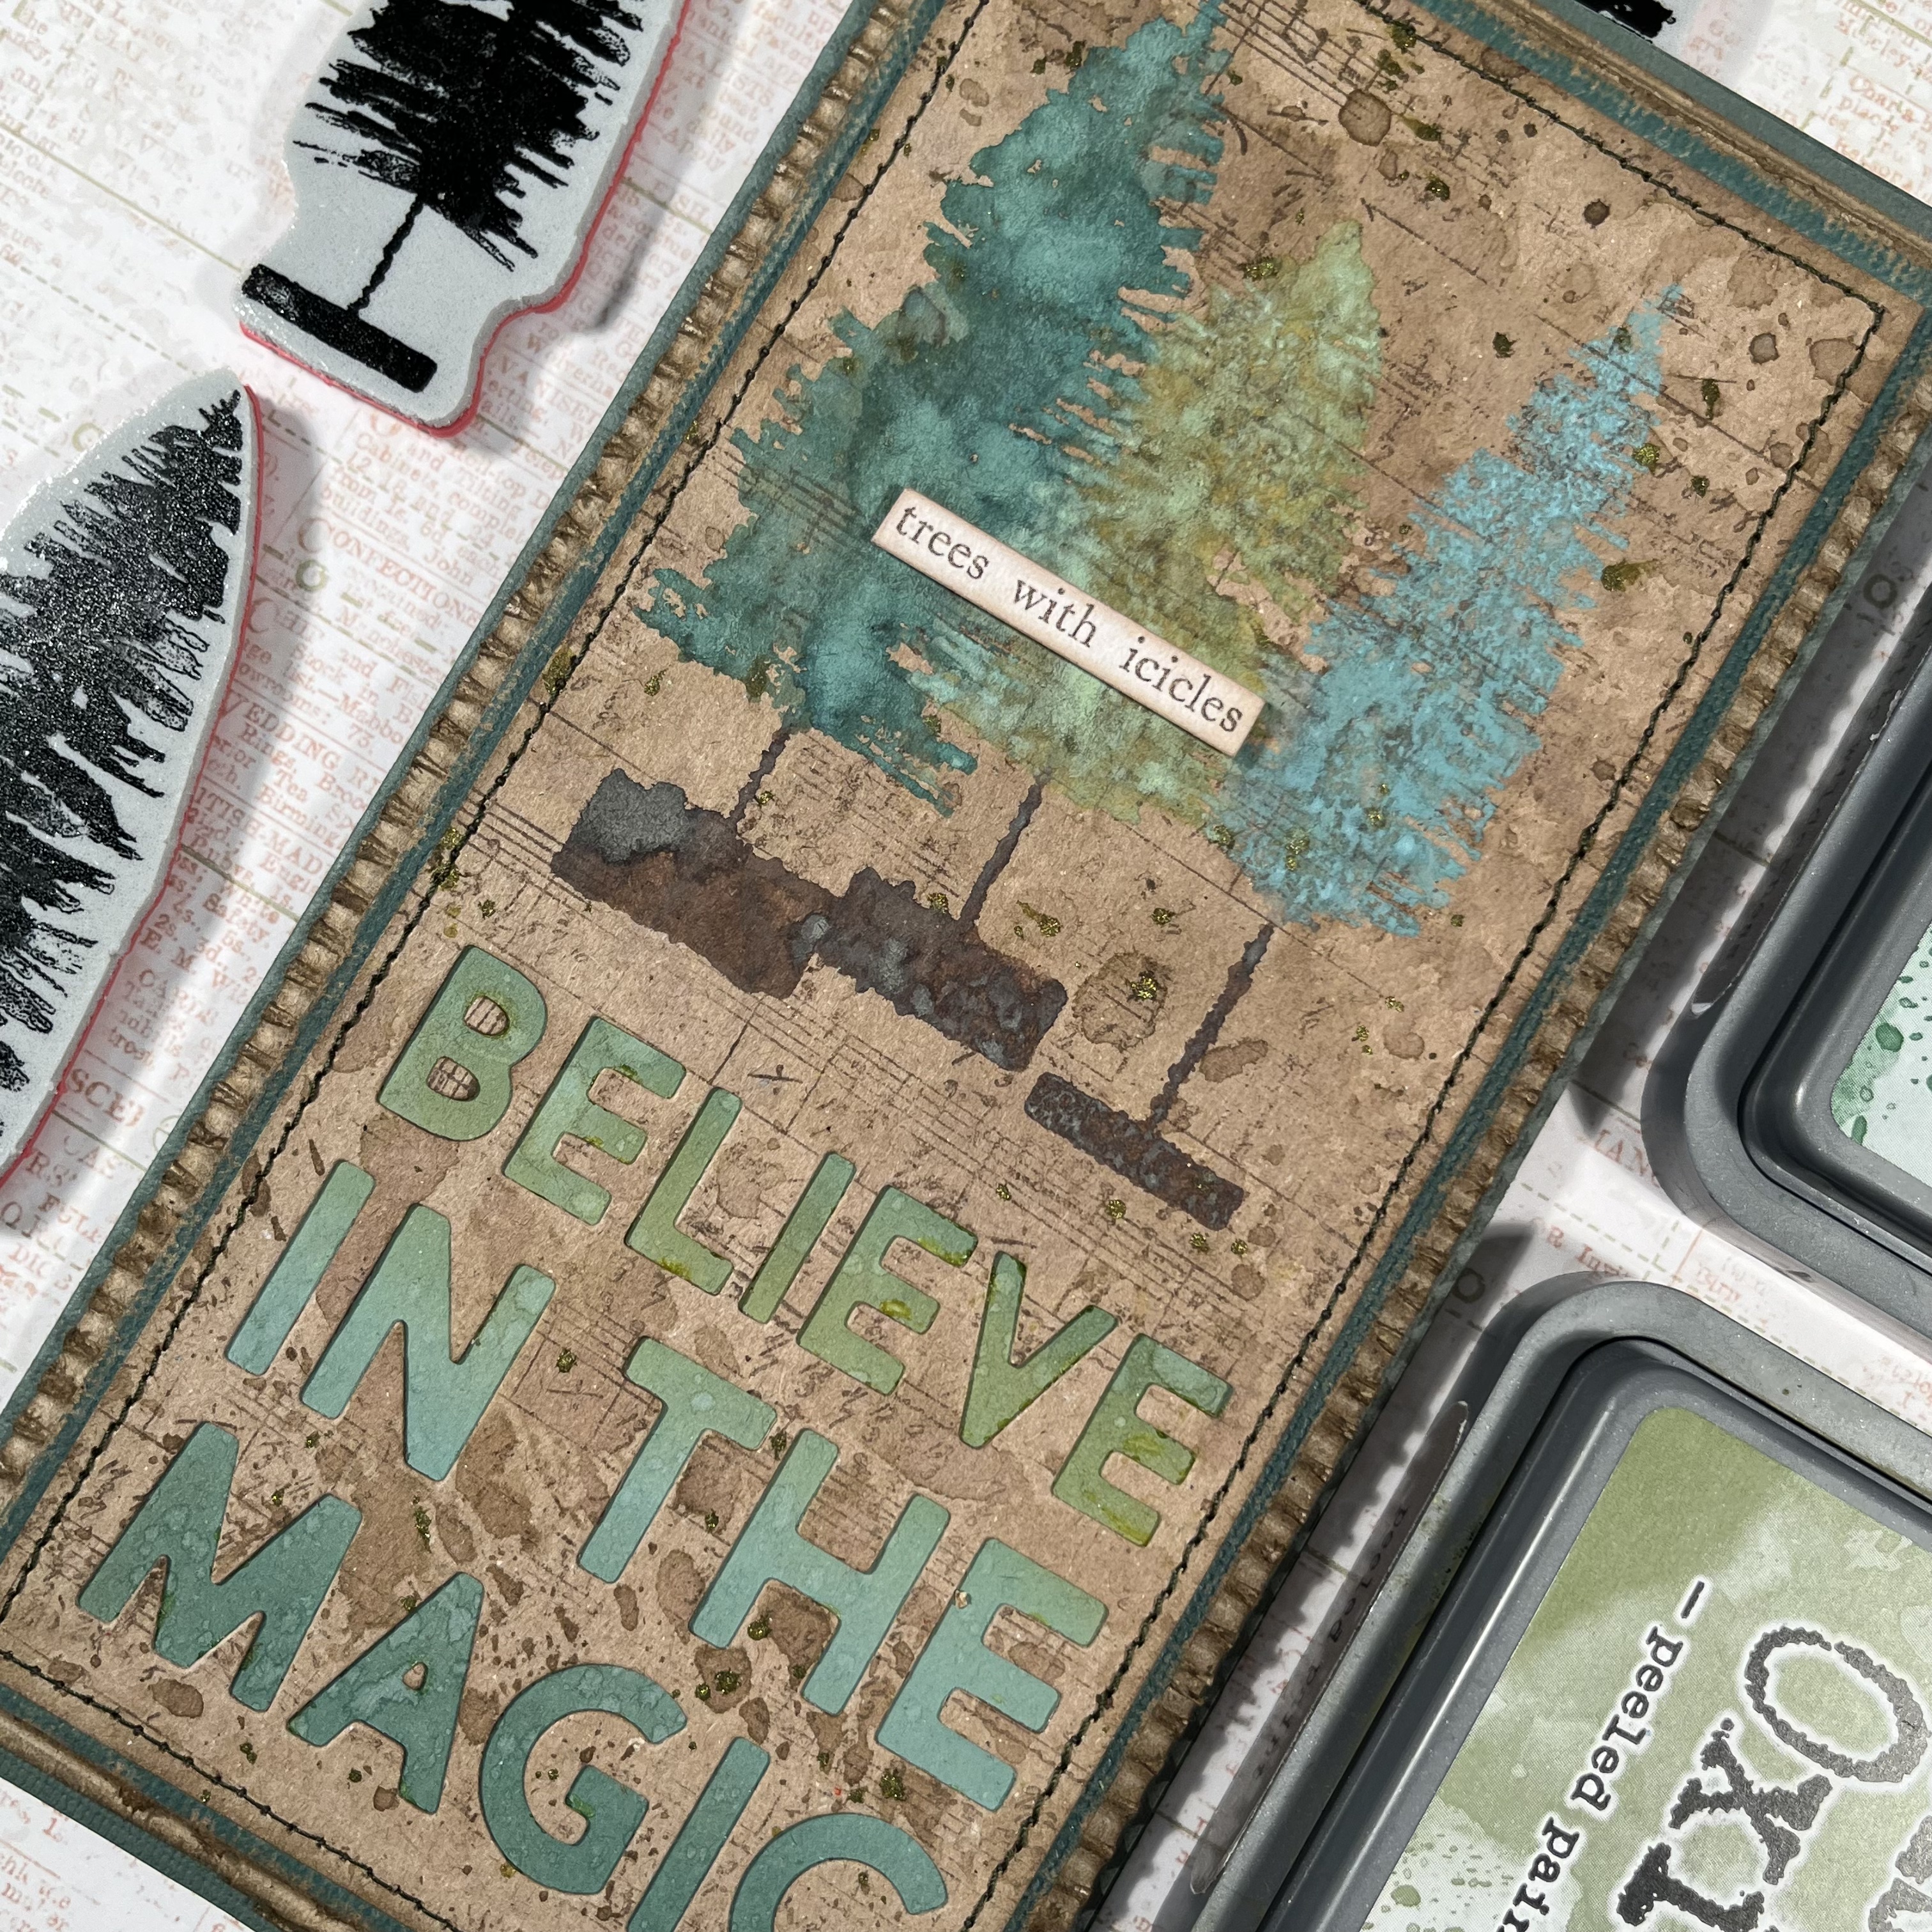
I started with a piece of Watercolor cardstock, stamped the music stamp random with Distress embossing ink and used platinum embossing powder. Heated with my heat tool. 

Then I sprayed the background with Distress Mica stains in Winter frost, Frosted juniper and Empty tomb. I inked the edges with Frayed burlap Distress ink. I used the Frosted juniper and spritzed some speckles on the background. 

I stamped one of the stamps in the upper left corner with Black soot Archival ink.


Then I stamped the wreath on Watercolor paper and colored it with my Distress pencils. I stamped the bow twice and colored. Then I inked the Holly leafs with Embossing ink pen’s, and added Frosted Crystal embossing powder. Then heated with my heat tool.


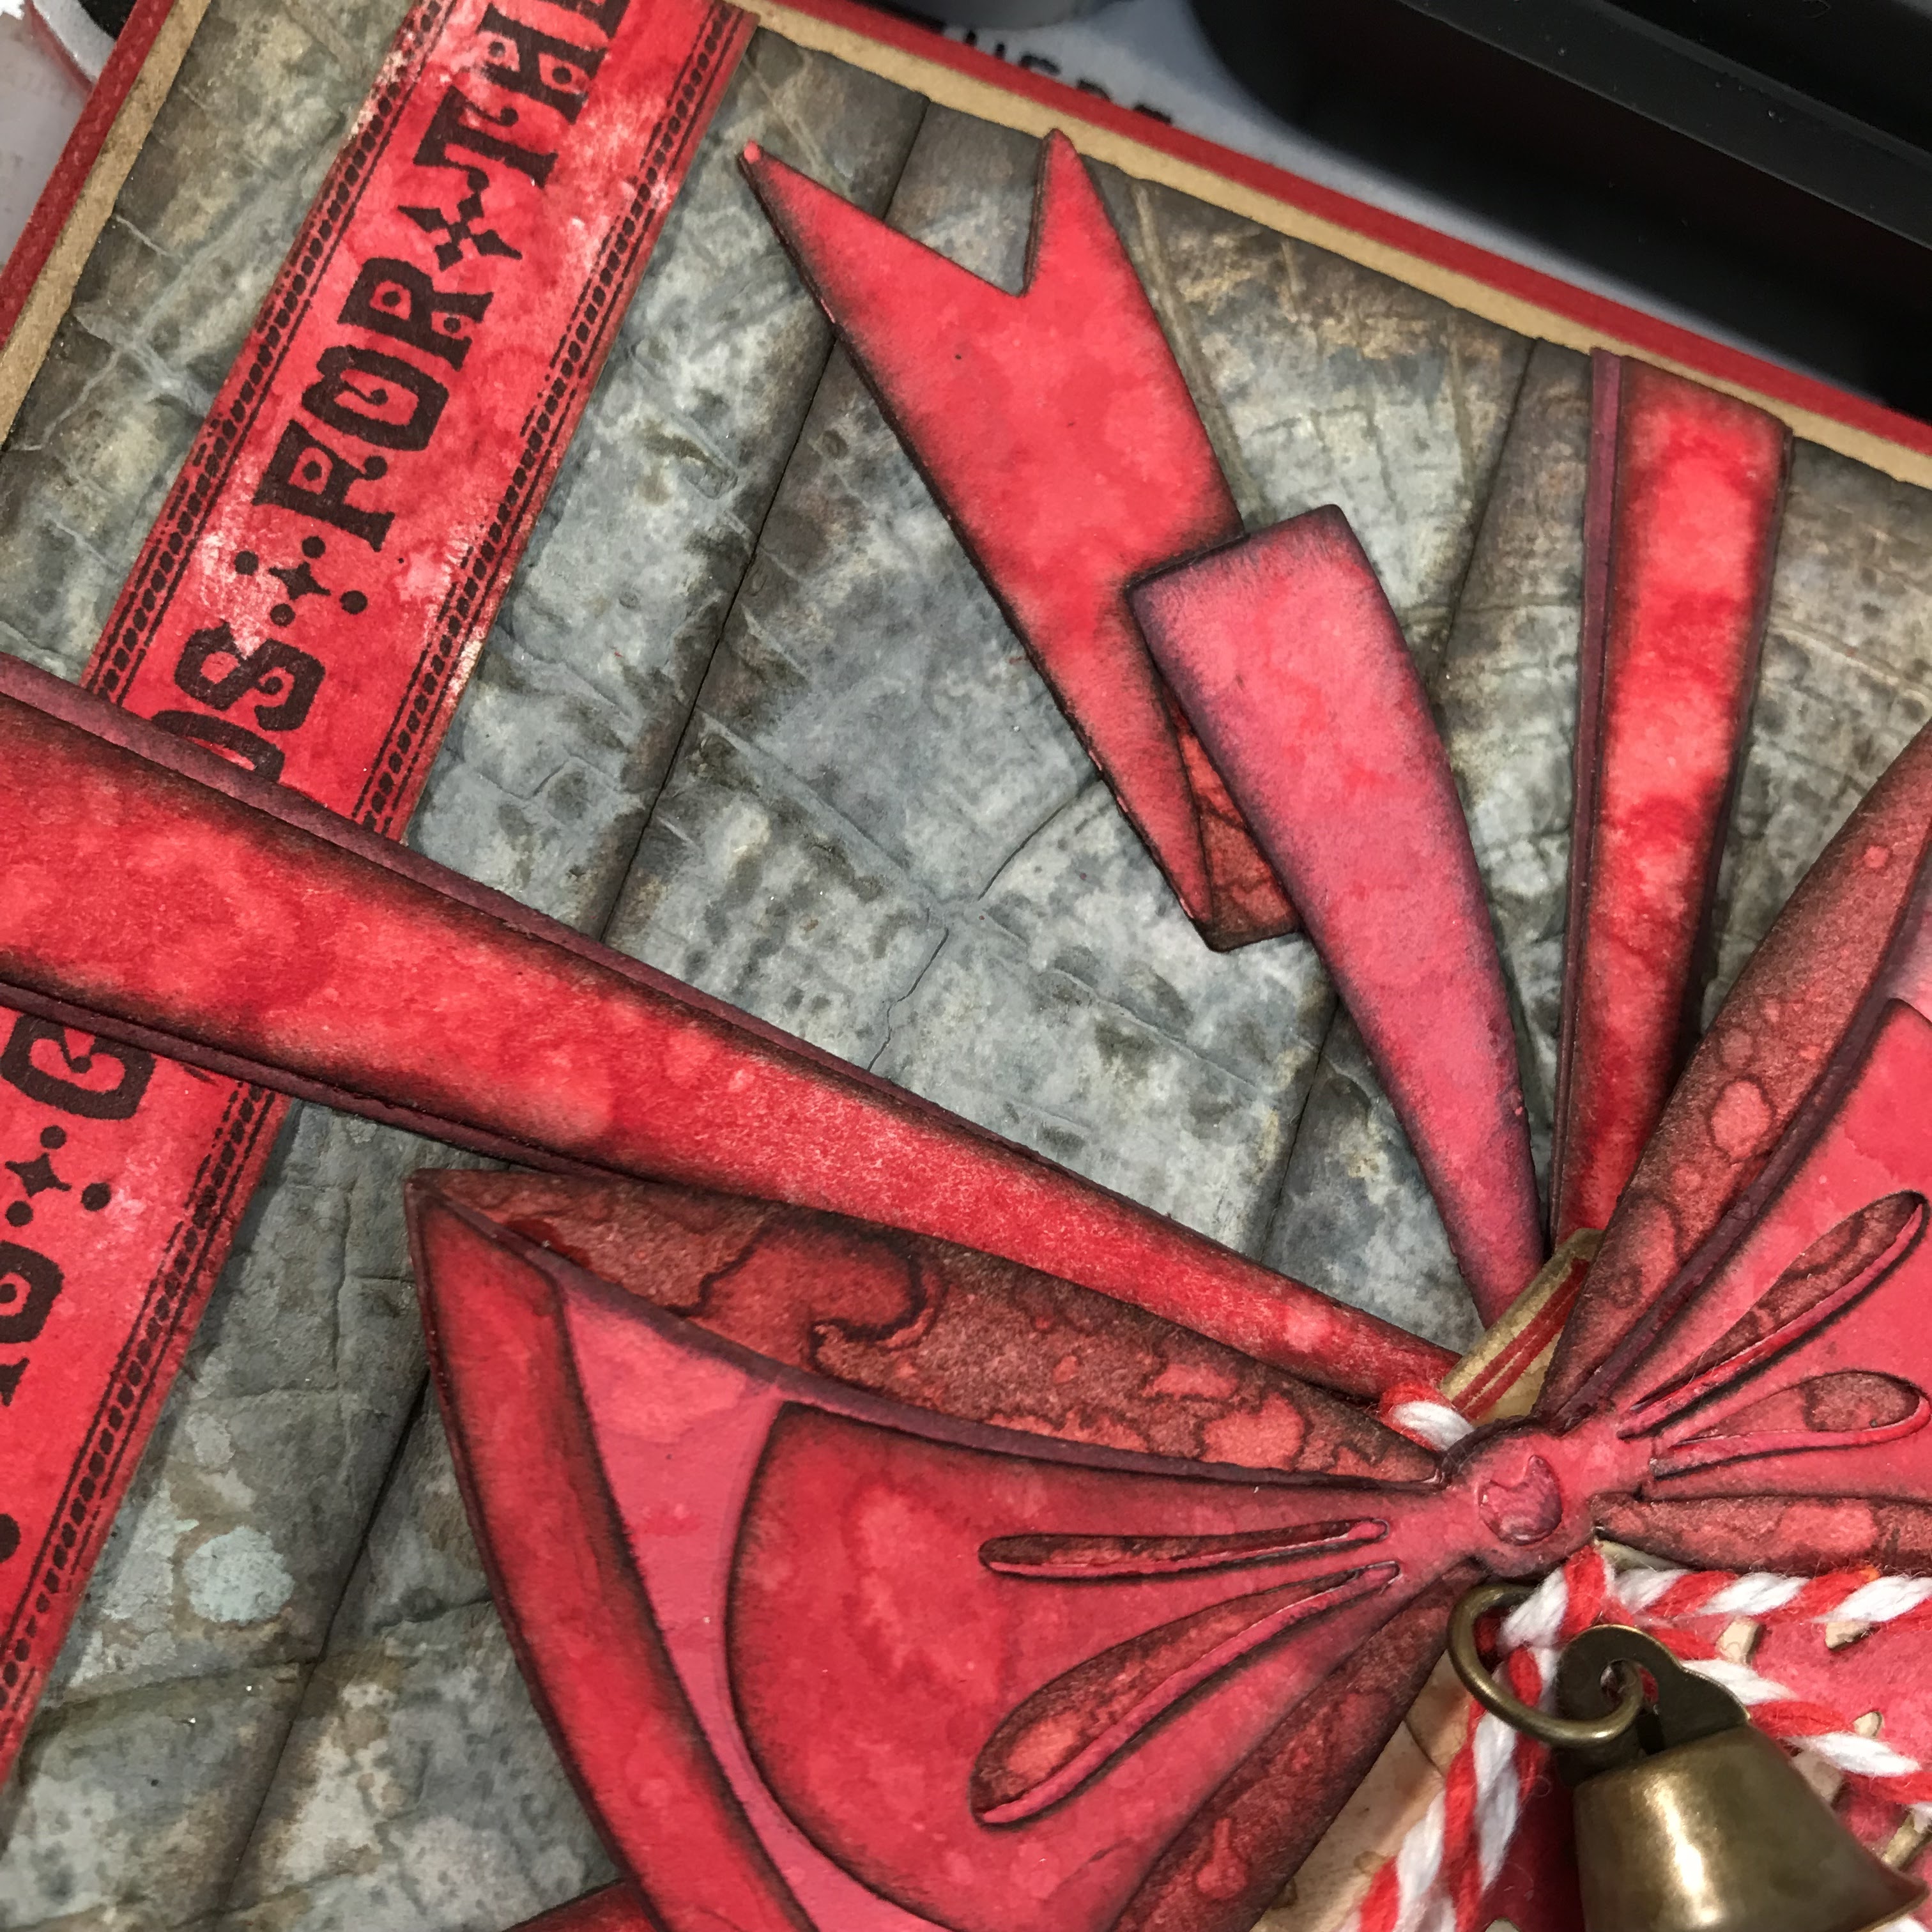
I fuzzy cut the wreath and the extra bow, inked the edges with Frayed burlap Distress ink. 


I cut a piece of Distress white heavystock, inked it with Distress inks and stamped the “Merry Christmas” with Ground espresso Archival ink. Then I inked the piece with Distress ink embossing ink and used Frosted Crystal. I inked the edges with Frayed burlap Distress ink. I layered the plaque on a sanded and inked piece of  Kraftstock, with 3D foam. In each corner I put a Mini fastener. 


I layered the card on an inked and sanded piece of Kraftstock, then a sanded and inked Metallic Kraftstock platinum, and finally a green cardbase made of sanded and inked Kraftstock with 3D foam. 


I put hexagon fastener’s in the upper corners and mounted the wreath on the card with 3D foam. 
Tied som string around the card under the plaque. I used some string and fastened two tiny bells on the bow’s. 

Thank you very much for visiting my blog, 

/ Susanne

Totally inspired by Tim Holtz Holiday hoopla

Hello and welcome, 

Here are my take on Tim’s idea with the poinsettia 3D embossing folder. I must say I was so tempted to try this technique. If you have missed Tim’s Holiday hoopla inspiration, search for it on YouTube.

So much inspiration! 


Thanks for visiting, 

/Susanne 

Bottle brush trees - Believe in the magic

Hello and welcome, 

This card is very similar to the card in my last blogpost. 


I used another die for the words on this card. 


I used white heavystock behind the words instead of Woodgrain cardstock on this card.


Thank you very much for your visit today, 

/Susanne


Bottlebrush trees - Joy

Hello and welcome, 

It’s time for some Christmas cards! A little late to the party on social media, but here I have some cards anyway. 

I have used the new stamps and dies from Tim Holtz for this card. 


I started with a piece of Heavy Kraft stock, inked my craft mat with Frayed burlap Distress ink, sprayed with water and dipped the background. Heated with my heat tool. Repeated until happy. Then I stamped the music stamp from CMS458, Department store with Ground espresso Archival ink. 

Time to stitch around the edges with my sewing machine. 


Then it was time for the bottlebrush stamps. I put them in my stamp tool, one at a time, inked with Distress Oxides and sprayed a little bit with water. Then stamped. Dried with heattool. Then I repeated the same with all three trees. 


I diecut the word “Joy” with Sizzix die 666062, Bold text Christmas. Then I inked some Woodgrain cardstock with Distress Oxides, in an ombré style. Then I glued that piece behind the diecut. 

I opened the cap on the Distress mica stain Holly branch and splattered some on the background. Heated again. 


I mounted the background on sanded and inked Kraftstock, then on an inked piece of cardboard with 3D adhesive. Then I glued the card to a Kraftstock card blank.
I finished the card off with a Clipping sticker Christmas which I inked and adhered with a 3D foam.


Thank you for visiting my blog today, 

/Susanne 


söndag 6 november 2022

Christmas bow card

Hello and welcome, 

It’s time for the first Christmas card of the year! I was lucky enough to receive my new Distress ink’s in the beautiful Lumberjack plaid red. Such a rich and beautiful red! And I also used my new bow die and Tree ring 3D embossing folder. 

This make is inspired by the Sizzix make Yoku @scrapxoxo made for Tim’s Sizzix live. She made a stunning Ideaology piece, but I went for a card. 


I started with a piece of Distress Watercolor paper and used my Tree ring 3D embossing folder. Then I sprayed it with different Distress spray stains and Distress Oxide sprays. Finally I took a Distress ink pad and “smeared” it directly over the background to reach the raised areas. Then I cut it in five similar sized pieces, inked the edges with Distress ink in Frayed burlap, and glued them side by side on a copy paper. 


I inked a piece of White heavystock with Lumberjack plaid Distress ink and stamped the text from CMS442 Jolly Santa. Sanded lightly and inked the edges with Frayed burlap DI. 


Then I cut all the pieces from 666063 Bowtied from White heavystock, inked with Distress ink in Lumberjack plaid DI, DOX and Aged mahogany DI. All edges are inked with Black soot DI. 


I cut a tag with my old 657188 Tiny tabs & Tag Bigz die from Distress Mixedmedia heavystock, inked with Frayed burlap DI. Stamped with some CMS 323 Holiday Postmarks with DI Lumberjack plaid. I wrote two frames around the tag with a thin red pen. (I have Tim’s new Framed tags die on my wish list for Christmas)😊. Then I inked another White heavystock piece with the new red, and cut out the words with 666062 Bold Christmas. Glued the words on the tag. 


I glued the bow to the background, all pieces accept from the big bow. I put a string on the tag and then I adhered the tag with 3D foam, and finally the big bow on top. I tied a Tiny bell with the string, with a jump ring between. 


I mounted the card on an inked piece of Kraft paper then to an inked piece of red cardstock with 3D foam. 


I will try this card over at Simon says stamp Monday challenge - Christmas. 

Thank you very much for your visit! 

/ Susanne


måndag 31 oktober 2022

Happy halloween with Otis the moon

Hello and welcome, 

31 October, already. I can’t believe it. However, we don’t celebrate Halloween so much in Sweden, but I love to make for Halloween. This card is my last for this year, then over to Christmas making. 😊

I was fortunate to win this Otis die in the Tim Holtz addicts group on FB. So now over to the make: 

I started with the background, a piece of Distress Mixedmedia heavystock. Used my moon mask and some  Distress mica spray stains and Distress spray stain in Black soot. Using the technique Tim shows in his YouTube live demos.

I then used my stamping platform and stamped the corn branches from CMS451 The scarecrow, with Archival ink Black soot on the background. Then I stamped the webs from CMS346 Tangled webs with embossing ink and embossed with white embossing powder. I inked the edges of the card with Black soot Ditress ink. Stitched around the edges with my sewing machine. Then I cut “BOO !” with 665995 Bold text Halloween from the background. Inked a piece of Distress Mixed media heavystock white with some yellow tones of Distress oxide. I glued the yellow piece behind the cutout word. 


I cut all the pieces from 665998 Otis Colorize from White heavystock, then colored them in different yellow Ditress Oxide inks. Spritzed with water and finally inked the edges with Frayed burlap DI. He is such a cool character. I did the same with the star, and for the bat I used Black soot and Hickory smoke DOX. 


I cut out the people from an old Sizzlits die, “Halloween shadows” from Blackout Kraftstock and one piece from white heavystock. Then I colored the white piece with yellow Distress Oxides. Glued them together a little bit offset for a shadow. I cut another piece from white heavystock, sprayed with Distress Mica spray stains and then stamped “ by the light of the moon” text from The scarecrow stamp set with Black soot Archival ink. 


I mounted the moon, the star, the people and the text on 3D foam and adhered them to the card. The bat is glued directly to the background. I used a thin black pen for the eyes on the bat, and for a shadow on his wings. 


The background is mounted on a piece of yellow sanded Kraftstock, then inked the edges with Frayed burlap. The next layer is a piece of sanded Blackout Kraftstock. These layers are adhered with 3D foam between. Then glued to a card blank. 

For you who celebrate Halloween, a Happy Halloween from me and Otis🌛.

Thank you very much for visiting my blog, 

/Susanne


söndag 23 oktober 2022

Table of the Skeleton File folder with cards

Hello and welcome, 

Finally the Chapter 3 die Specimen from Tim Holtz arrived to me! I absolutely love all the dies from chapter 3. The other dies arrived a while ago, but I had to wait for the Specimen. 

I started to make a file folder with Halloween theme, just to play with the folder and some TH Halloween stamps. 


I started with the folder, then I made some cards to store in it. 


The cards are die cut from Distress Mixed media heavystock, “dipped” in Frayed burlap Distress ink. 


The edges are inked with Frayed burlap.


Some details are colored with different red tones of Distress inks. 


Some text and detail stamping with Archival ink in Plum.


I used a couple of Tim’s Halloween stamp sets. 


I will try my file folder in a challenge over at Simon says tamp Monday challenge - Halloween/ Spooky. 


Products used: 
Dies: 665930 Specimen, 665926 Collector
Stamps: CMS 435 Rest in peace, CMS346 Tangled webs, CMS138 Apothecary, CMS412 Examination, CMS411 Anatomy chart
Frayed burlap Distress ink, Distress mixed media heavystock, Archival ink - Plum

Thank you very much for visiting my blog, 

/ Susanne 


Scarecrow envelope

Hello and welcome, 

Today I will share an envelope with Tim’s Scarecrow stampset. A perfect envelope for a small gift for halloween 🎃. 


 I have used the moonmask in the background. 


Here you can see the backside of the envelope.


The envelope is diecut from 665926, Collector. 


I have colored the Scarecrow with my Distress pencils. 

I will try this envelope in a challenge over at Simon says stamp Monday challenge  - Halloween/Spooky.

Products used: 
THMSK Moon mask
Distress mixed media heavystock 
Distress Oxide spray, Distress spray stains, Distress Mica spray stains
Collector die 665926
CMS451 The scarecrow, CMS407 Snarky cats Halloween, CMS413 Dearly departed
Long fasteners, Alcohol ink Mushroom

Thanks for visiting my blog, 

/ Susanne


fredag 14 oktober 2022

Happy Halloween in green

Hello and welcome, 

A green Pumpkin from me today, made with Tim Holtz products.


As most of the times I started with the background, cut a piece of Ideaology Kraftstock black and sanded. Then I diecut the text with 665995 Bold text Halloween. I inked my craft mat with different green Distress Oxides. Sprayed with water and dipped a piece of white heavystock in the ink. Dried with heat tool, repeated until satisfied with the result. Then I stitched with green thread around the edges with my sewing machine. 

I stamped the spiderwebs CMS346 Tangled webs with white embossing ink and embossed with my embossing gun. I used my splat brush and made some splats on the background with Peeled paint and Crushed olive Distress oxides. 
I diecut the bats from 665556 Pumpkin patch, both from green and black sanded Kraftstock. I glued them together a little bit offset, then glued them on the card. Used a white Posca pen for the eyes. 


The pumpkin is cut from the same die set as the bats above, from white heavystock. Then inked the same way as the green piece behind the letters, described above. I then inked the edges with Black soot Distress ink and glued the pieces together with Ditress collage medium. 


I sprayed a piece of Mummy cloth with Peeled paint Distress Oxide and then inked it with Black soot and Forest moss DOX. I fastened the Mummy cloth with my Tiny attacher and then adhered the pumpkin with 3D foam. 


I painted two pieces of Ideaology Machinery heads with Acrylic paint, then I used Distress crayon in Walnut stain above the paint. Glued the to the card with Distress collage medium. 


I layered the card on a sanded piece of Kraftstock then on a black card blank, both with 3D foam between.  I inked edges on the black card with some DOX. 


Hope you make some time for crafting today.

Thank you very much for visiting my blog, 

/Susanne


fredag 7 oktober 2022

Make a wish

Hello and welcome, 

Another card today, made with mostly Tim Holtz products. 

This card is for my Dear Mother. She had her birthday back in September, but we are going to have her “party” tomorrow. 

I started to cut a piece of Mixed media heavystock, then I painted it with white tinting base (Deco art). Then I sprayed the base lightly with water and dipped the card in Distress ink Frayed burlap, which I have adhered on my media mat. Dried with heat tool.

I stamped the background with The text stamp from CMS328 Entomology with Pumice stone Distress Oxide. Then I used my splat brush and spritzed with Uncharted Mariner Distress paint. I stitched the edges with my sewing machine.  I also stamped a few stamps from CMS448 Eccentric on the background. 

The hearts are made with Crackle paste (Deco art) and Tim’s stencil THS017. Let dry and crackle. When dry I made a “wash” with the same paint as above and used a brush and “painted” over the hearts. When dry, I used Distress crayon in Walnut stain over the hearts, and smeared them out to get the crackles visible. This is inspired by one of Zoe Hillman’s makes. 

I stamped “Make a wish” with a CMS394 Tiny text, on White heavystock. Inked the edges with Frayed burlap. I fastened the “sign” with a Tiny clip. 


I added Distress ink Frayed burlap to my media mat and sprayed some water. Then dipped a piece of White heavystock, dried and repeated until happy. Then I stamped the flower from CMS447 Bothanical collage with Black soot Archival ink. Colored the image with Distress inks. 


I fuzzy cut the left side of the image and ripped the other side. Inked the edges with Frayed burlap DI. 


I colored the paper doll with Distress crayons. Inked the edges with DI Frayed burlap. 


I backed my card with a piece of sanded Kraftstock with 3D adhesive. Then I made a cardbase from Kraftstock and adhered the other two layers. 

I will try this card in the challenge over at Simon says stamp Monday challenge - Stitch it. 

Have a nice day, 

/Susanne