Blogg

Blogg

tisdag 29 december 2020

Christmas card with Tim’s chalkboard technique

Hello, 

Hope you all had a nice and calm Christmas. Today I will show a card I made using Tim’s chalkboard technique, but instead of a stamp I used the snowflake stencil THS 050. Then I decorated the card with some idea-ology ephemera, mini clip and a Distress crayon colored paper doll. I used some clear rock candy glitter on some of the ephemera pieces. 


Thank you very much for visiting, 

/Susanne 

måndag 21 december 2020

Christmas banner card

Hello, 

I have been inspired by Zoe Hillman to try a banner for a card. I have used one of Tim’s cat stamps and the little bird. Many layers with different papers and the Tiny text Christmas stamp as a background for the cat. Some ideaology decor as well. 


Thank you very much for visiting, and Merry Christmas!🎄🎅🏼

Take care, 

/ Susanne. 

Another Christmas tag card

Hello, 

This time I have used Tim Holtz Bold tiding stamps. I love these big letters and words. For the background I used a tag which I have used crackle paste and a stencil on, then some Distress Oxide and Distress inks. I diecut a piece for the stamp and inked the stamp with 3 different colors of Distress Oxide, Rustic wilderness, Forest moss and Black soot. Then I colored the paper doll with Distress crayon and a watercolor brush. I also used some “gold” wire around the image. And some grit paste as snow. 


Thank you for visiting, 
/ Susanne 

Christmas tag card

Hello and welcome, 

Just wan’t to pop in and write some quick blog post’s with some more Christmas cards. I love Tim Holtz cat stamps, so I have used them on this tag card. I started with the tag, a stencil and micro glaze. Then I colored the cat with Distress inks. I also used a die cut frame, text stamp, milk cap and an ideaology decor which I painted with different acrylic paints, and two tiny bells.


Thank you so much for visiting, 


/Susanne. 

torsdag 19 november 2020

Christmas card for Berit

Hello and welcome, 

I have made a Christmas card for a women who was my Mother’s former colleague at work. She is over 80 now and she loves cats. So what was more appropriate to make a card with one of the Snarky cat Christmas stamps from Tim Holtz. The rest of the products used are also from Tim.

I started with the background, a piece of Mixed media heavystock, a snowflake stencil THS050 and micro glaze technique, with Distress inks in Broken China and Tumbled glass. Then I used a smaller stencil THMS 093 with some crackle paste and embossing glaze in Speckled egg, let dry, then heat dry. Then I spritzed some water and used more embossing glaze in the same color. 

I stamped the “post stamp” from CMS323 Holiday postmarks in three of the corners and embossed with red embossing powder. Then I stitched around the edges with my sewing machine.

For snow under the tree and parcel I used some texture paste opaque and Distress rock candy glitter. 

I colored the cat with Distress inks, and fuzzy cut it. 

Then I made another background with green Distress inks and die cut the tree, with 660978, Woodlands. 

The birds in the tree are from the same stamp set as the cat and they are also colored with Distress inks. I die cut the number “24” from a red background I made with Alphanumeric Shadow numbers. I also used Stickles glitter in Aged mahogany and Platinum to “decorate” the tree.

The “GOD JUL” is Swedish and means Merry Christmas. I die cut it with 664177 Alphanumeric label. 

I mounted my card on a red sanded Kraft cardstock piece and then I created a “card blank” from a light blue sanded Coredinations cardstock.

I will try this card in the “Happy holidays” challenge over at  Simon says stamp blog - Monday challenge .

Thank you very much for visiting today, hope you feel inspired to create.

/ Susanne 


tisdag 17 november 2020

Snarky cat Christmas card

Hello and welcome, 

My first Christmas card this year. I have used some of the new stamp set’s from Tim Holtz for this quite small card, 10x13 cm. Normally I make bigger cards.

I started with the background cut from mixed media heavystock. I smooshed Walnut stain Distress ink on my craft mat and spritzed with water, dipped the card and heated with my heat tool. Build up layers and dried in between. Then the same procedure with Distress Oxide in Speckled egg. Then I stamped the Music & Advert CMS358, with the new Distress color Rustic Wilderness Oxide. I also stamped the small trees from CMS427 with the same color and then again slightly above/beside with Speckled egg Oxide. I also used my splatbrush and white paint, for some “snow”.

I also stamped the small hollies from CMS427, with Archival Jet black. Then I colored the hollies with Distress ink’s. I used Distress Stickles glitter for the berries. I stamped the text from CMS416 Snarky cats Christmas with embossing ink and used black embossing powder. I then diecut the background with Stacked postage die from Sizzix, 662696. 


For the second background I used a piece I have made before, I think I used Black soot and Stormy sky Distress ink and Oxide on watercolor paper. I used the postage die for this one as well. I used the stamp CMS424 Tiny text Christmas with gold embossing powder. It is difficult to se on the photo but the text says “jingle all the way”.

The cat is from CMS416 Snarky cat Christmas, and I have colored it with Distress inks. 
The cat is mounted to the background with 3D adhesive. 
I mounted the card on two more backgrounds, one from cardboard which I have inked the edges on with Walnut stain Distress ink. The next one was from sanded, metallic Kraft cardstock which I inked the edges on with Ground espresso Distress ink. Finally I made a card base from sanded colored Kraft cardstock. 

I decorated the card with a string and two Ideaology Tiny bells. 
I will try this card in Simon says stamp - Monday challenge - Happy holidays.

Thank you for visiting my blog, 

Take care, stay safe.

/ Susanne 


onsdag 11 november 2020

Father’s day card - Arthur

Hello and welcome, 

I have made this card for my dear Father. In Sweden we celebrate Father’s Day in November so this year it was last Sunday. I have used Tim Holtz products for this card.

Started with the background papers for Arthur. Used mixed media heavystock and my Distress inks on my craftmat, spritzed with water and dipped. I dried between the layers with my heat tool. Repeated until I was happy with the result. Then diecut all the pieces for 664730 Arthur, and assembled him.

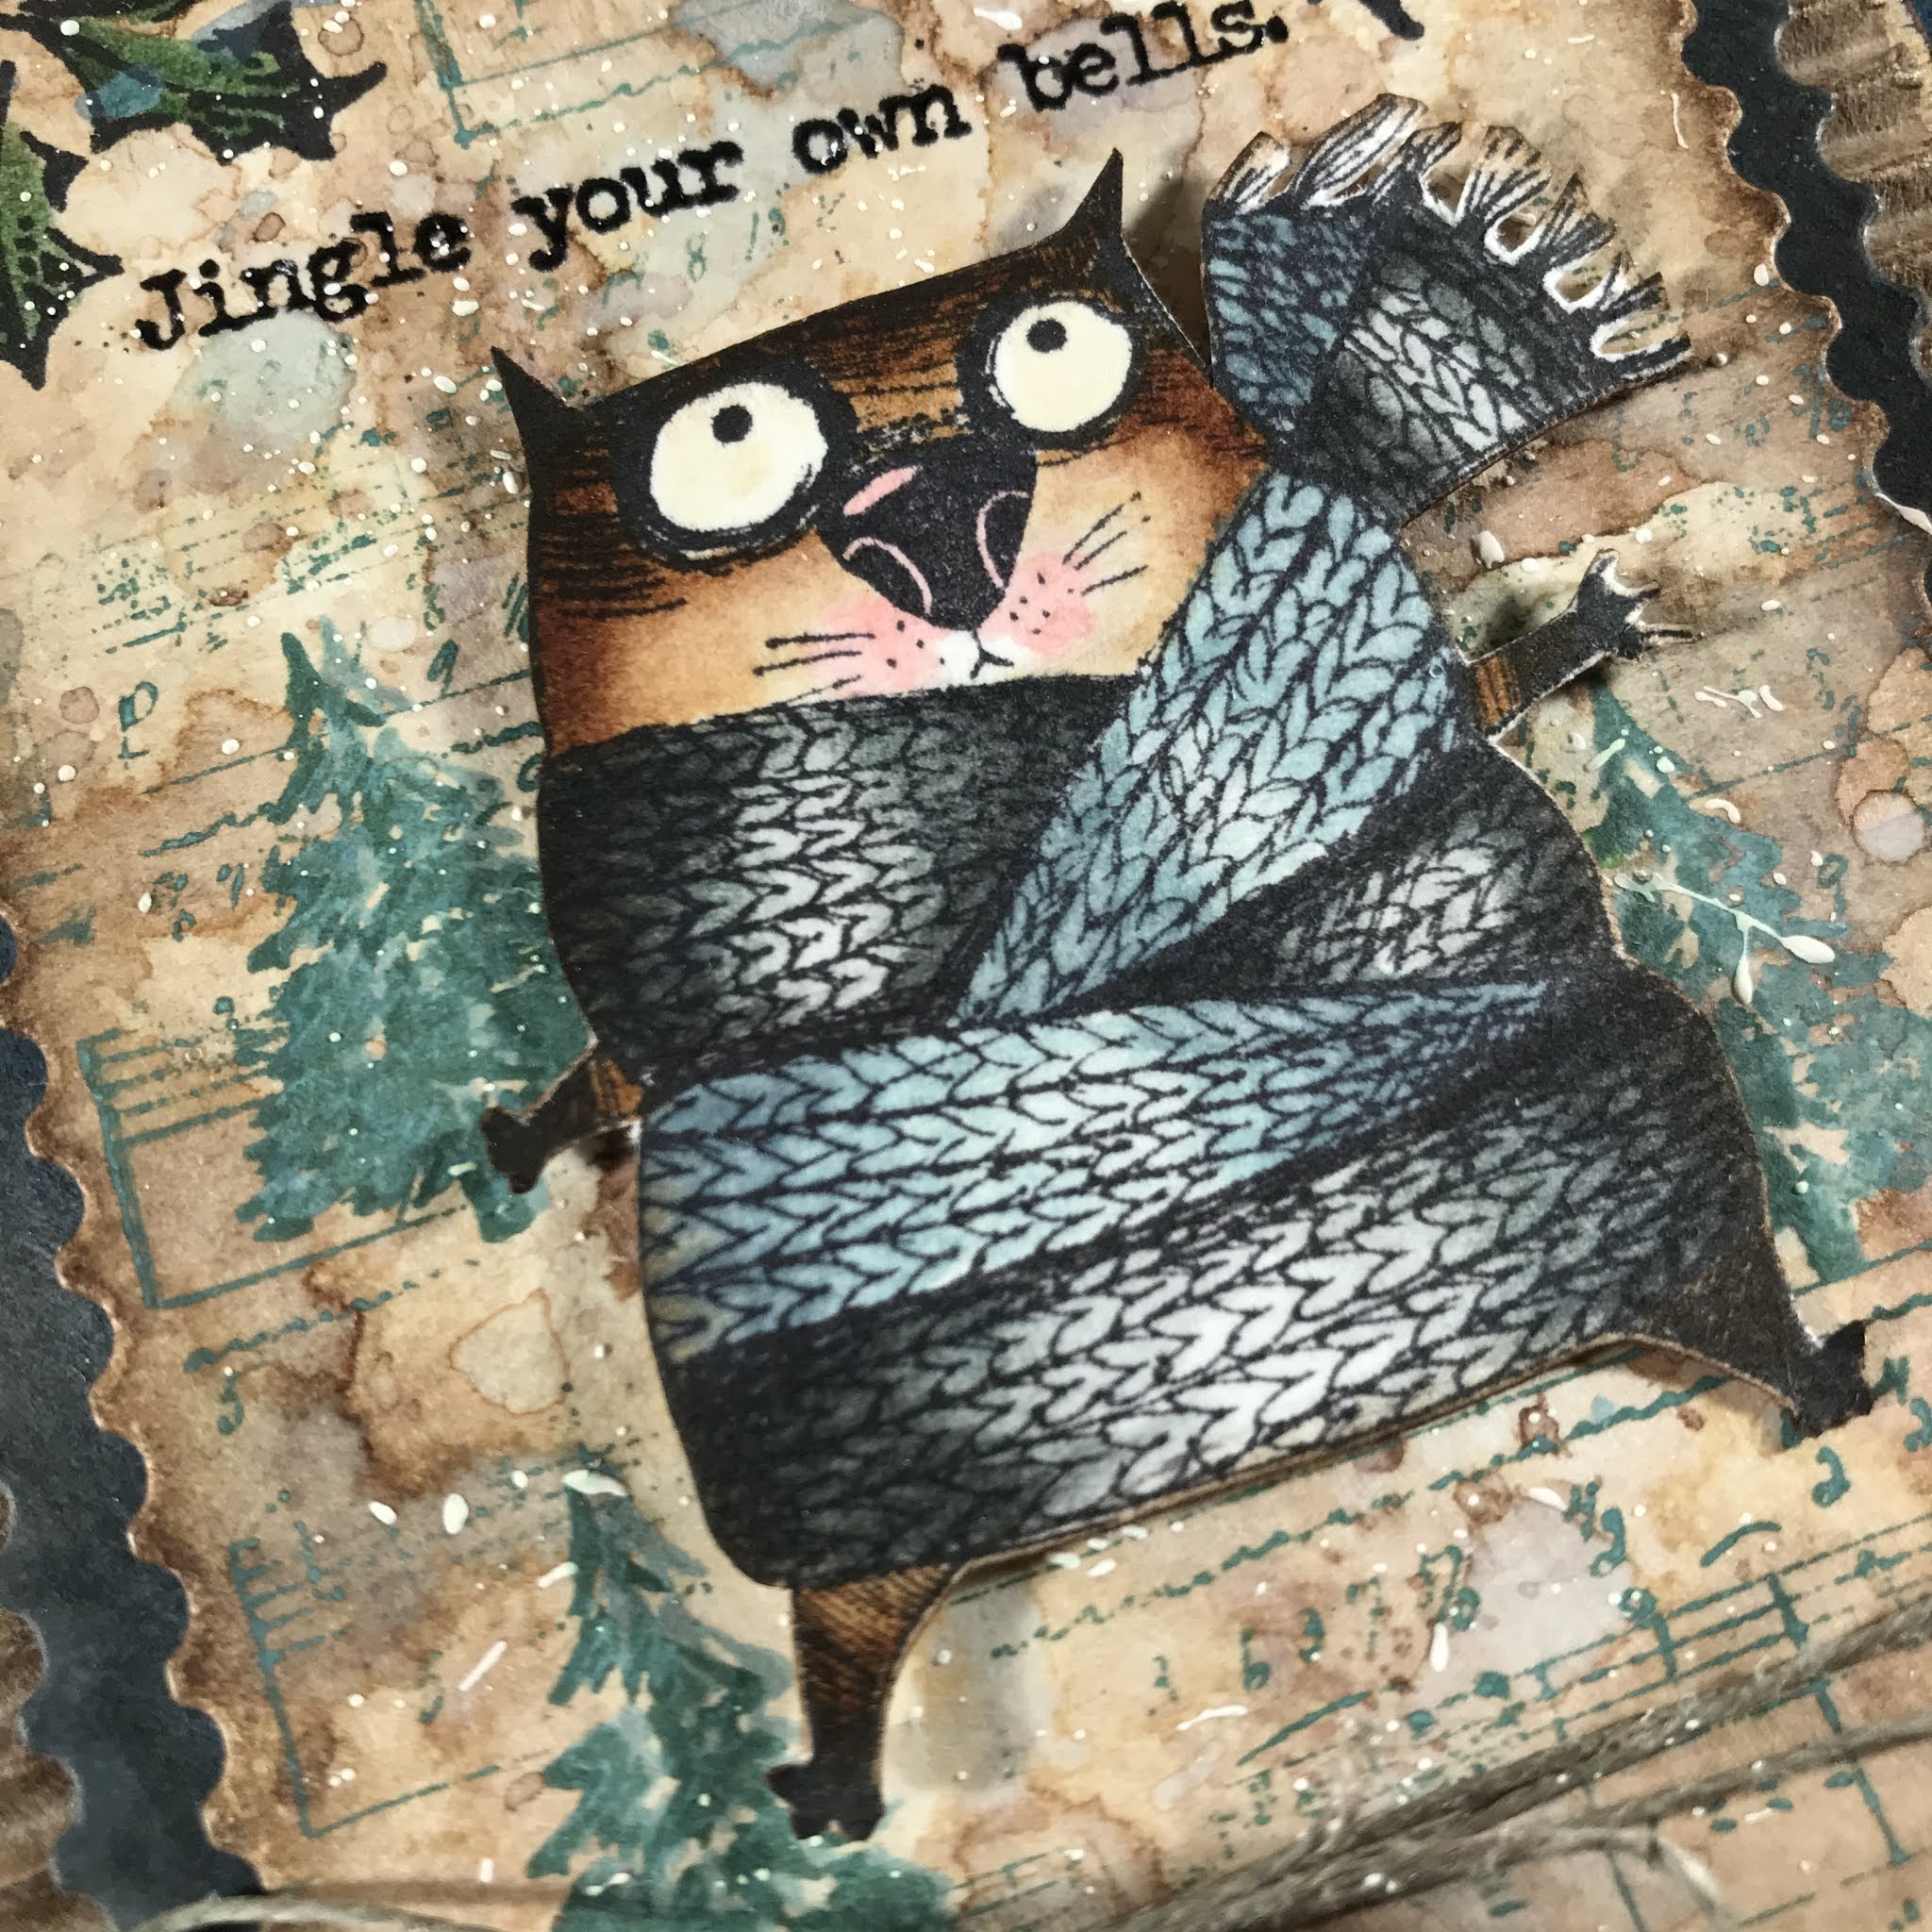
The background is from watercolor cardstock. I used Distess ink in Antique linen for the moon, then I diecut a circle mask from post-it paper for the moon. Then I used Blue Distress inks for the rest of the background. Spritzed with water and then I used the Stamptember 2019 stencil for the stars, crackle paste and Embossing glaze in Speckled egg. Let dry. Then heated it. I then spritzed some water to create drops over the “heaven” and then again using Embossing glaze in Speckled egg. I used my sewing machine to stitched around the edges.

Then I diecut the twigs behind Arthur with 663086 Tangled twigs in metallic gold Kraft stock, sanded it and then inked them with Ground Espresso Distress ink. 

On this photo you can see the crackle on the stars. I decorated the corner of the card with a number, (my Father likes numbers) from Remnant rubs “Numbers”. You can also see the Embossing glaze drops.

I made a small “flag” from inked heavystock layered on sanded, inked gold metallic Kraft stock. Stamped with CMS394 Tiny text. Embossed with black powder. Fastened it with a mini fastener. 

The “sign” with “Grattis Pappa” = “Congratulations dad”, is made from inked mixed media heavystock, stitched with sewing machine around the edges. I layered it on a piece of inked Cracked leather cardstock, and hand stitched it three times on the ends to the background. The letters are 664177 Alpanumeric label, cut from metallic Kraft stock, sanded and inked.

Here you can see how I layered the background to sanded, inked metallic Kraft stock, sanded colored cardstock, a piece of inked cardbord and finally to a black card blank. All adhered with 3D adhesive for dimension.  

I choosed Arthur for my Dad’s card because in Sweden we often say “ you are wise as an old owl”, and that saying fits well on my Father. 

It was a very long time since I visited my parents in their home due to Covid, so it was really great to meet each other in their home (we live in the same city) and hand over this card and a small gift for my Father. (The recommendations in Sweden now are that you are allowed to meet your nearest family). 

Thank you very much for visiting my blog today, take care. Til next time, 

/ Susanne

söndag 18 oktober 2020

The Creepy eye

Hello and welcome, 

Another Halloween make from me. I love to make for Halloween even though we don’t really celebrate Halloween in a bigger manor here in Sweden. 

For this card I have used Tim Holtz products, accept from the black modelling paste which is from Deco Art. 

I started with the background, cut a piece of watercolor cardstock, inked it with Walnut stain Distress ink and spritzed with water. Inked the edges with the same ink. Then I stitched around the edges with my sewing machine, using zig zag and straight seam randomly. After that I used Walnut stain Distress crayon on the edges. Now it’s time for the THS 010 Eyechart stencil and black modelling paste. Let dry. Apply some translucent Grit paste on random places. Let dry completely. Then Walnut stain crayon on top of the Grit paste. I splattered some black acrylic paint with my Splat brush and finally stamped some spiderwebs from CMS346, Tangled web. 

I stamped the “eye” image from CMS413 Dearley departed, colored it with Distress ink’s and reinkers. Fuzzy cut and then inked the edges with Distress ink Walnut stain.

The small label in the upper left corner is a stamp from CMS412 Examination, stamped on Walnut Stain inked watercolor cardstock. The edges is inked with DI in Black soot. Fastened with a Idea-ology Index clip. 

Here you can see the stamped web, Grit paste, the stitching and the splatters. 

To get some dimension I took a Idea-ology Creepy eye, distressed it with Walnut stain Distress crayon and glued it on to the stamped image. Then I mounted a Idea-ology Optical lens with steel wire to the card, right above the eye. Very suitable. 🙂.

At the bottom of the card I mounted a sanded Idea-ology Quote chip with Walnut stain inked edges, also with steel wire. Here you can see that the stamped image is adhered with 3D adhesive.

To finish off the card I cut a piece of cardboard which I painted with black acrylic paint, matted on a sanded piece of “red” metallic Kraft stock with Black soot inked edges, which finally was mounted to the card base. All layers have 3D adhesive in between to get dimension. 

I will try this card over at Simon says stamp Monday challenge - Spooky.

Thank you very much for visiting, 

/Susanne 

Walk of fame - Halloween

Hello and welcome, 

Today I have a card which idea I came up with last year, a Walk of fame card with zombies. And what is more suitable than to try this idea out with the “new” slimline card trend.

I have used Tim Holtz products for this card.

I started with the background, cut a piece of watercolor cardstock and used Distress Oxides in Hickory smoke, Pumice stone and Black soot. Then I used the THSM086 stencil Stone with Distress ink Black soot.

Then I smeared out Grit paste translucent over the whole background, I wanted the feel of asphalt. When dry, I used Distress crayons in Black soot and Hickory smoke over the paste. More concentrated around the edges. I also used Distress ink Black soot around the edges. On top of everything I stamped the splatters from CMS 412 Examination, with Jet black Archival ink. Then I was happy with my “pavement“. 
 
The Zombies are stamps from CMS350 Zombies, which I stamped on watercolor paper and colored with Distress ink’s and reinkers. 

I used a star die from stash (I think it is an old Sizzix die), and cut out in both metallic Kraft stock and a dark red Kraft cardstock. I sanded them and on the metallic ones I used Walnut stain Distress ink on the edges. 

For the title I cut letters from Black Kraft stock and Crackling campfire inked watercolor cardstock, using the 664177 Alphanumeric label die. I glued the letters together and offset them to achieve a shadow behind the orange letters.

I die cut the small labels from 657188 Tiny tabs & tags, colored with Distress ink Crackling campfire. The “No” is a stamp from CMS225 Correspondence and the actual numbers are from CMS 404 Glitch 2. Then I took mini fasteners to attached them to the card. The idea with the tags was that you should be able to search in an archive for the number to see who is actually hiding behind each zombie 🙂, creepy. 

To finish the card I made a panel from watercolor cardstock and inked with Crackling campfire Distress ink, scratched the edges and then inked them with Black soot. Then mounted them with 3D adhesive on a black card. 

I will try this card in the challenge over at Simon says stamp Monday challenge  - Spooky.

Thanks for visiting and take care, 

/ Susanne