Blogg

Blogg

tisdag 30 mars 2021

Mickey card

Hello and welcome, 

Today I will show a card that I have made for my dear brother. We love Disney and especially Mickey and Minnie, so I thought why not make a Mickey card. 

I remember a card that Emma Williams made some years ago where she used the Tim Holtz Stitched circle dies for a Mickey card. I was inspired by that card and wanted to make my own take. 

I started with the background, a Mixed media heavystock piece. Then I used different Distress inks and Oxides in red tones on the background. Dipped and dried and spritzed some water and finally dried again. Then I took the THS 003 stencil and some used. Tim Holtz Micro glaze technique. After the Micro glaze I used Walnut Stain Distress ink and reinker. I love that technique. I used my sewing machine and stitched around the edges. I also used the Star stencil in the Stamptember 2019 kit and used the same technique as above, but these stars are not easy to see. 

I also used some transparent Grit paste on random places around the edges, and some Walnut stain Distress crayon. 

Time for the Mickey head, I die cut circles from Mixed media heavystock with the 662229 Stitched circles die and then I used the 3D Texture fade Foundry to get that texture. Then I used Hickory smoke and Black soot to “ink” the head with. I used Black Distress crayon around all the circles. 

The heart is also cut from Distress mixed media heavystock and “inked” with different red Distress Ink’s and spritzed water. Dried between layers and repeated until I was satisfied. I cut the heart from the Faceted heart die, 664156. Then I took some sewing tread and wired around the heart. I also glued some hardware heads on the heart. 

The small stars on the background is die cut from sanded Metallic Kraft stock using the dies 660226 Shape strips and 662421 Snowglobe #2.
I also stamped “15 12” from CMS358 Music & Advert on black sanded Kraft cardstock with white embossing powder.
Fastened it with a idea-ology Index clip.

I think “Believe in the magic” is a very suitable text for a Disney themed card, so I used the CMS424 Tiny text, stamped with embossing ink and Platinum embossing powder on black sanded Kraft cardstock. I adhered them with 3D foam adhesive. 
The “Mickey” text is die cut both from Mixed media heavystock inked with yellow and red Distress inks, with 661815 Bigz XL, Deco alphabet. After cut I inked the edges on all letters with Walnut stain Distress ink and glued them together a little bit offset. Then I highlighted the letters with a white Posca pen. 
I painted two Adornment stars with yellow acrylic paint. And then I used a red “wash” over the yellow and finally a brown “wash”. Then I glued the stars on each side of the “Mickey” text. 
Finally I layered the card on yellow sanded Kraft cardstock (with Walnut stain inked edges), and then another layer, black sanded Kraft cardstock. All mounted with 3D foam for dimension. 

Thank you so much for following along, 

Have a nice evening, 
/Susanne 


söndag 21 mars 2021

Rusty Bunnies

Hello and welcome, 

Time for some bunnies! 

First a little story from where I got the inspiration for this card. Me and my friend did a trip to New York many years ago. We both had some wishes what we would like to see and do and my wishes was to see Wayne Gretzky play icehockey (yes I said many years ago) in Madison square garden and to visit a church in Harlem to listen to gospel. My friends wishes was to visit an art museum and a Thai food restaurant. At that time we didn’t have any Thai food restaurants in Sweden, at least not in our area. We did all this and lots of more things. One thing was to visit the American museum of natural history, and in one department the showcased real “stuffed” animal, a little creepy but that was how it was, and from there I got the inspiration for this card. Weird? Yes a little maybe, but you can get inspiration from anywhere, right?!

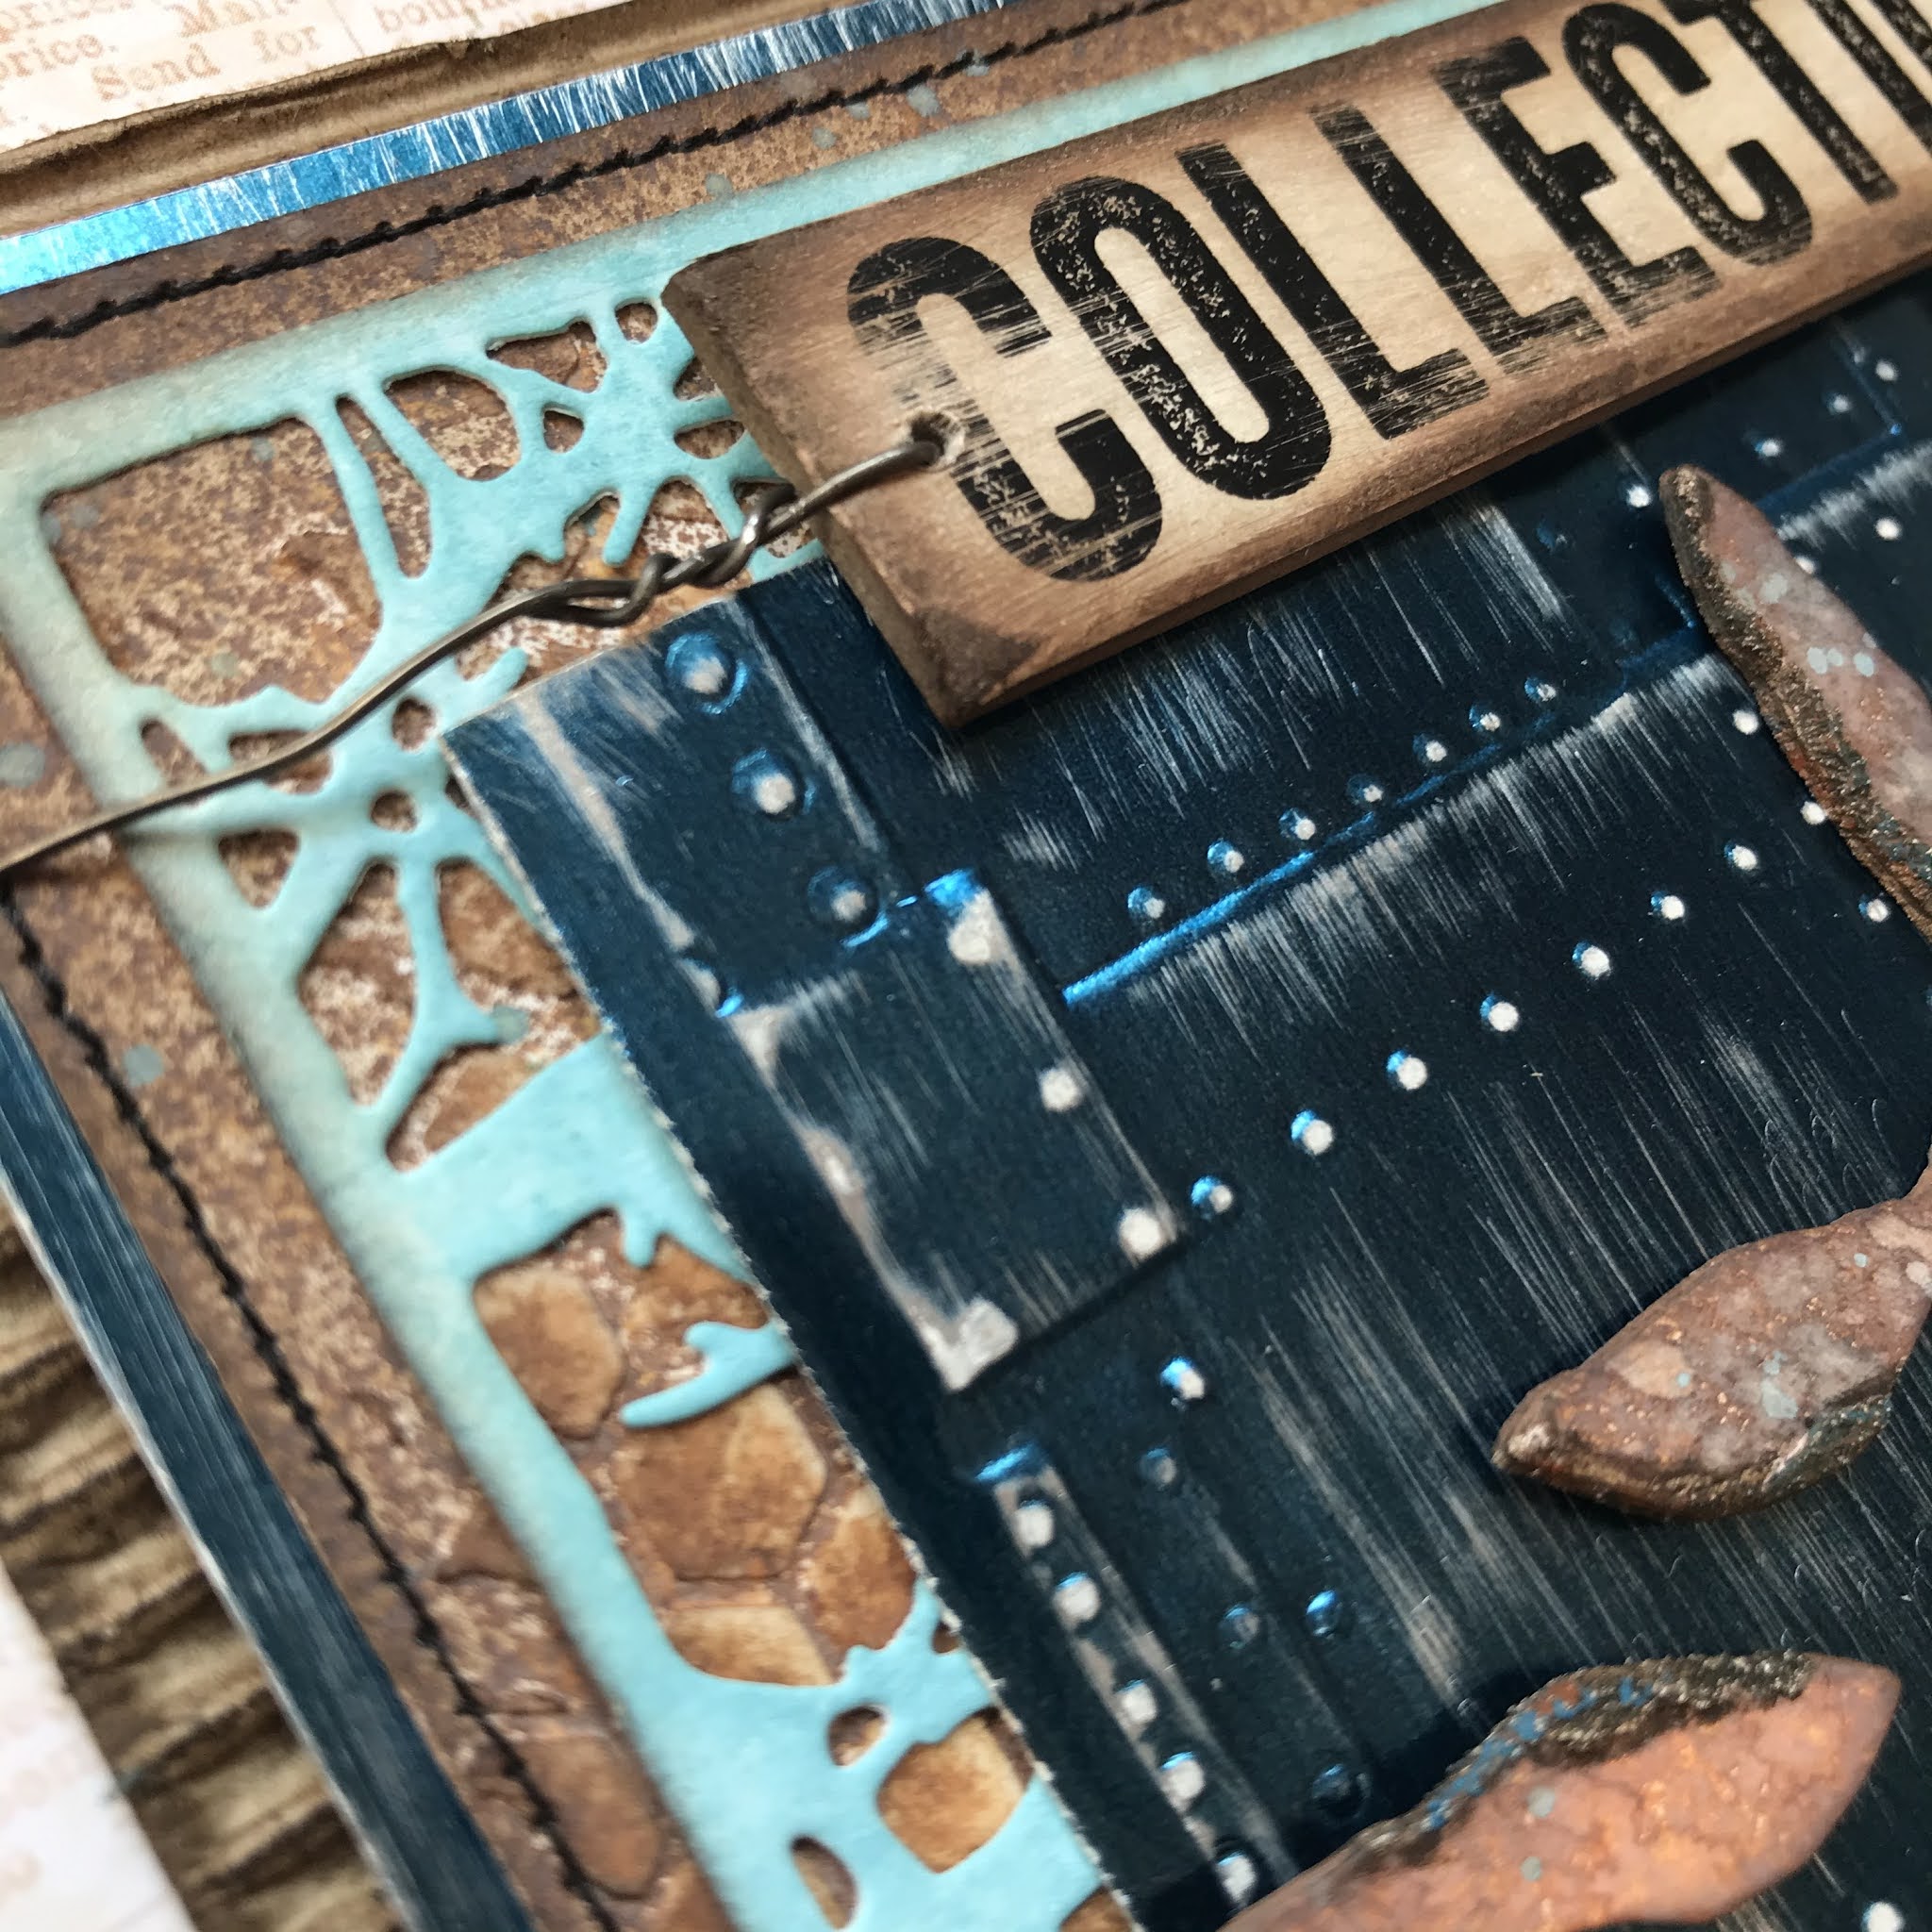
Now over to the card, I started with a piece of watercolor paper and some Distress texture paste. I used the Tim Holtz stencil THS 129, Decayed, in random places. Then I used Distress Oxide sprays over it all. I also stamped some words with CMS225 Correspondence and CMS339 Mail art. I stitched around the edges with my sewing machine. I also inked the edges with Walnut stain Distress ink.

Then for the next layer, I used some Distress inks in turquoise tones and then Die cut with the 663086 Tangled twigs.

Then I cut a piece of blue Metallic Kraftstock, ran it through my Big shot with the Tim Holtz 3D embossingfolder Foundry. Then I sanded the piece. 

Time for the bunnies, they are diecut from a Distress Oxide sprayed watercolor background, with the Sizzix die 664421, Bunny hop. I used some Grit paste random on the edges, then some Distress crayon in Walnut stain, Rusty hinge and Peacock feathers to get that rusty look. I wired a steel wire around the blue layer, than attached the bunnies with some idea-ology mini fasteners. 

It’s difficult to see on the photos, but when I mounted the blue layer of cardstock above the other layers I curved it slightly to get some more depth on the card. I put some chipboard pieces glued together under it. 
I sanded a Quote chip, inked it with Distress ink and then crayons on the edges and drilled holes in the ends and mounted it with steel wire to the card. 

I used Walnut Stain Embossing glaze on a Story stick, then some Antique linen Distress crayon to get the number more visible. Attached with a long fastener. 

The small tags are cut from Distress Mixed media heavystock, with 657188, Tiny tabs and tags, inked and stamped using the small numbers from CMS 225 Correspondence. fastened with long fasteners. 
I mounted the above described layers on a piece of inked cardboard, then to a card blank. I used 3D foam between the layers to get dimension. 


I will try this card in the Simon says stamp Monday challenge - Recycle. I have recycled the cardboard background from and old shoe box and the steel wire. 

Thanks for visiting and have a nice day, 
/ Susanne