Blogg

Blogg

lördag 3 oktober 2020

“She was peculiar” tag

Hello and welcome, 

Now it’s time for my favourite making season, Halloween. Even though we don’t really celebrate it here in Sweden I like it a lot. I have used Tim Holtz products for this tag. 

I actually started this summer with the making of the background, using a Mixed media heavystock tag. I used one of my favourite techniques by Tim, the Micro glaze resist. First I used the THS010 Eyechart stencil with Spiced marmalade Distress Oxide spray and Carved pumpkin Distress Stain spray. Then the THS 061 Linen stencil with Faded jeans and Walnut Stain Distress Oxide spray.

I used seambinding band for the bow, which I sprayed with Crackling campfire and Black soot Distress spray stain. The cobwebs are stamped with CMS346 Tangled webs. The small bats are from the Sizzix die 661588. 
I colored the paper dolls with Distress crayons and a small brush. I also used the new stencil THS149 Script on the background. The black spots on the background is from the new stamp set CMS412 Examination. 
The big girl has a string around her arm, that is also sewn around the small girl’s head, so she can swing her from side to side like a marionette. Creepy. I have also put a black heart on the big girl, from Sizzix die 660226. 


The church Is from 664194. Cut out from black Kraftstock and sanded. I used my sewing machine and stitched around the edges. And inked the edges as well with Black soot Distress ink.
Under the girls I placed a sanded Quote chip, which I also inked the edges on, with Walnut stain this time. I mounted the Quote chip with two long fasteners. 


I will try this tag in a challenge over at Simon says stamp blog -Add a photo. I chosed to use the paper dolls as photos. 

Thank you very much for visiting today, 

/ Susanne.  

lördag 19 september 2020

Birthday tag for my dear Mother

Hello and welcome, 

Today I will show a tag that I have made for my Mother who just have turned 75. I am 54 years young🤣 myself and are so privileged and happy to have both my parents in good health with us.
I wanted to make something more than a card for my Mother, so first I decided to make a Curio box, from Tim Holtz die. But when I had finished the box I changed my mind and mounted it to a Small Etcetera tag, that my husband “adjusted” to size. He shortened it and made it a little bit more narrow as well. I wanted it to fit the Idea-ology worn wallpaper. Said and done, here comes some photos and som descriptions: enjoy, 😊.


I I I started to diecut the Curio box from chipboard (the backside) and from Mixed media heavystock (the front) and then used the Flourish 3D embossingfolder on the front piece. Then I used used Distress Oxides 
in Speckled egg, Bundled sage and Shabby shutters to color the front. I glued some design papers from Tim’s French industrial inside the box, then some Distress collage medium. Then I used Distress crayon in Walnut stain and a waterbrush on the designpaper to get it look more old. (a great tip from Paula Cheney, learnt in one of her classes I was lucky to attend). 👍🏼. Than I aged the edges wit Distress ink Walnut stain.


Now to the background tag; I glued a piece of Worn wallpaper to the Etcetera tag, aged it with Paula’s technique mentioned above. Then I took some of Tim’s crackle paste on random places around the edges, and when dry some Distress crayon in Walnut stain. I also used the dot fade stencil with some texture paste to get some texture. I also used the splatbrush and some brown acrylic paint to get som small splats on the wallpaper.
 number in the upper right corner is a remnant rub - Specimen. Then I decorated the tag with some half pearls from Prima. 
For the pieces inside the Curio box I have used an Idea-ology thimble, some bouquet flowers which I colored with waterbrush and Distress ink. I also used some fake moss. In the bottom of the box I took an old piece of lace, distressed it with Walnut stain ink, glued it to the bottom with Collage medium and then glued the baubles in. The darker baubles are colored with Alcohol ink in Mushroom. The small “sign” is a stamp from CMS138 Apothecary. Stamped with Speckled egg DOX, on a piece of Mixed media heavystock that has been inked with Walnut stain. The words are from Sticking clippers Christmas.

The candle is made from a tutorial by the very talented Tami B, you can find it here . I think they are very cool. It was my first try making them and I struggled a bit because I was forced to use the big glue gun cause my small one was out of refills. But I was quite happy with the result. I placed one candle on each side of the box. 
75 is Idea-ology number blocks, which I colored the front with Weathered wood Distress paint, and stamped with CMS328 Entomoloy text stamp. Then I used a piece from Vignette hardware and screwed it in to the bottom of the number “5” and then a jump ring and finally the heart charm. The text “ a gift of love” under the number “7” is also from sticking clippers Christmas. And the “paper doll” is home made from a photo of my Mother when she was a little girl. I think she looks so cute and almost like a doll on this photo. 

The reinforcer of the tag is gessoed and then I stamped the text stamp again, and then some Embossing glaze in Speckled egg. Then some Distress crayon in Walnut stain. I made a bow from Crinkle ribbon and colored it with the same DOX colors as the box, and some Walnut stain ink. I put a Story stick on a jump ring and then attached it to the bow. I have used antique linen Distress crayon on the story stick to get the word more visible. On the upper left corner of the box I mounted a transparent wing with a mini fastener. The “From the heart” is a Metallic sticker. 
I used a baseboard frame - Lace, to “frame” the box, and before I glued it to the tag I used Embossing glaze Speckled egg and Distress crayon Walnut stain to age it. That is one of all great tips from the previous FB lives Tim treated us with earlier this year. 

 The“Follow your heart” Quote chip is treated the same way as the frame above. I mounted it with tiny attachers. The shelf under the box is an Etcetera trim with crackle paste. After dried I sprayed it with Speckled egg DOX spray. Then inked with Walnut stain ink.
I will try this tag in Simon Says stamp monday challenge - Frame it

Thank You so much for following me through this long blog post. I struggled a bit with the new format in blogger, the text “went away”. I don’t know in this moment how to fix it😊😅.

/ Susanne

onsdag 16 september 2020

The last of the three Snarky cat tags

Hello again, 

Here comes the third tag made with the same supplies as on the previous tags.

I think these cats and sayings are just hilaroius😹, I really like this stampset. So looking forward to get the Halloween set.

The Glitch stampsets are also some of my favorites. 


Thank you for visiting, 

/ Susanne


The second Snarky cat tag


Hello again,  

This tag is made with the same supplies as in the prior post with addition from the stamp set Mail art. I love the snarky sayings.

I have colored the cats with Distress ink’s and reinkers.


The two photos below is from the backside of the tag, 


Thank you for visiting, 

/ Susanne 

Snarky cats tag

Hello and welcome,

Time flies, that’s for sure. It’s been a while since I posted on my blog and Instagram. So here we go 🙂. I have done some crafting, and I will start to show some tags that I made during our vacation, (with limited supplies.)

I have used Tim Holtz stamps, Glitch 1, Glitch 2, Snarky cats and Faded type. Distress inks, sprays, Oxides, Oxide sprays and embossing glaze. Micro glaze and some stencils. 


This is the first tag I made, using the micro glaze technique from Tim. I love the look of that technique. 
And I also love the Snarky cats😻.


I sprayed with water and used the embossing glaze. That gives a cool look and some texture.

This is the backside of the tag. I gave it away as a bookmark.


Thank you very much for visiting, 

/ Susanne

söndag 7 juni 2020

Birthday card for my Father

Hello and welcome,

Today I will share a card I have made for my Father’s birthday, which is today. Happy Birthday Dad❤️. He turns 78 this year and we are not able to celebrate together the whole family as usual. But I baked a rhubarb pie, picked some flowers and made this card for him, so that he should feel that it is a special day anyway. I left it off outside their door and talked to him and my Mother in distance.

I have used Tim Holtz products for this card and used some of the techniques that Tim has shown in his FB lives.
I started with the background, cut a piece of Mixedmedia heavystock. Used Distress ink and Distress oxide in the new beautiful color Speckled egg on my craftmat, spritzed some water and started to layer. Drying in between layers. Then I added some Distress ink in Rusty hinge and Ground espresso. Inked the edges with Ground espresso Distress ink. Stitched around the edges with my sewing machine. 
Then I stamped with Inventor 7, CMS374 using Jet black Archival ink. I also used a tiny stamp from Glitch 2, CMS404. Then I spritzed with water and used Embossing glaze in Walnut stain and Rusty hinge. Love the look of it! 
I applied a thin coat of Micro glaze on the upper part of the stamped image. Heated with my heat tool, and then it is “safe” to color with Distress ink’s without bleeding from the ink’s on the background. This is such a great technique that Tim has been demoing. 👍🏼. 
Here you can see all the colors on the stamped image. I also used a stamp from Tiny text, CMS394 on a piece of Speckled egg inked paper. I inked the edges withGround espresso Distress ink, and mounted it with 3D adhesive on a piece of sanded and inked Metallic Kraft stock paper.
I stamped “No 78” with a small stamp from the Correspondence set, CMS225. The original stamp is No 74, but I masked off the number 4 and took number 8 from the same stamp. I love these fiddely things. 😊. I used Embossing glaze in Rusty hinge on an Index clip and then put the clip over the stamped piece. I stamped number 78 because it is how old my Father turns today.
Here you can see the small Glitch stamp.
I used the Steampunk parts Bigz die 664185. First from chip board and then from Mixedmedia heavystock. I glued the two different substrates together.
The propeller is cut from Woodgrain cardstock instead of Mixedmedia heavystock. To color it I used Distress ink and Oxide in Weathered wood. Then I took my Mini Distress ink pad in Ground espresso and drag over the surface, then inked the edges with the same color. I put a Hex fastener in the centre of the propeller. To color the Hex fastener I used Embossing glaze in Rusty hinge. 
I painted the circle part with Distress paint Brushed pewter, let dry. Added translucent Grit paste, let dry. Then I applied Distress crayons in Gathered twigs, Rusty hinge, Black soot and Peacock feathers, to achieve that rusty look.
The bolts are colored with Distress ink Ground espresso, then translucent Grit paste, and finally I used the same Distress crayon colors as on the circle. 
I mounted my card on a background cut from water color paper which I Sprayed with Distress Oxide spray in Faded jeans and Black soot. Inked the edges with Ground espresso Distress ink. Next layer is a Metallic Kraft cardstock #3 that I have sanded and inked the edges on as well. And finally a black card blank. I have used 3D adhesive between all layers for dimension. 

I will try this card in the following challenges: 

Simonsaysstampblog mondaychallenge - Make your own background

Sandee-and-amelie steampunk-challenge June - Anything goes Steampunk/ Industrial

Thank you very much for visiting, 

Take care, 

/ Susanne.  


fredag 5 juni 2020

Mother’s day card

Hello and welcome,

Hope you all are safe and well in these crazy times.

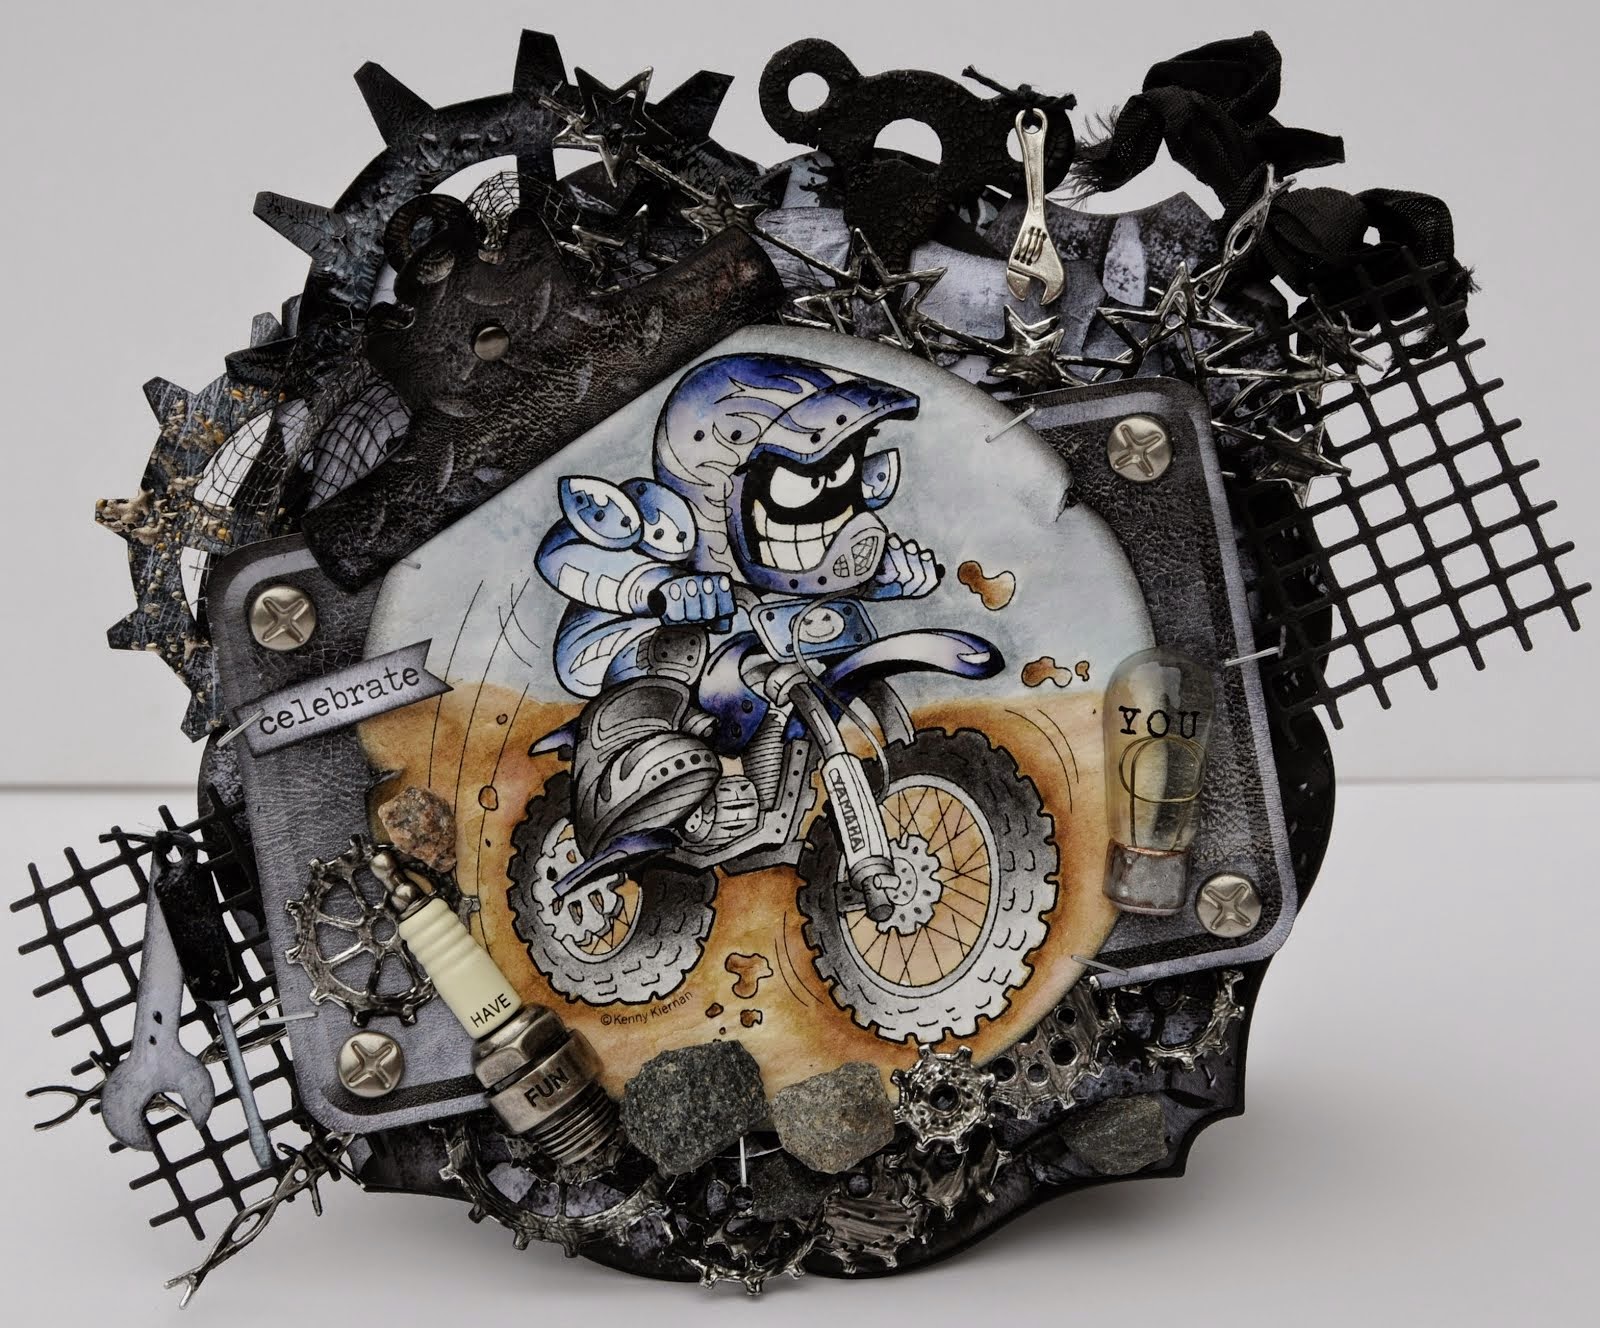
Today I will show a card that I have had in mind for a while. I got the idea when I first saw the Sizzix Tim Holtz dies 664439 Baggage claim. Here in Sweden we celebrate Mother’s Day in the end of May, so this year it took place the 31:st. As the situation is as it is, we took my Mother out for a picnic to a calm lake here in the Swedish forest, and brought some coffee, cake, a homemade card (this card) and some Tim Holtz goodies as a gift for my Mother who also enjoy’s making cards.
I have used a couple of techniques Tim so generously has been sharing in his very inspiring FB lives on this card.

When I was younger I wanted to go to London with my Mother but she was so afraid of flying, so she always said no. I tried so many times and years to talk her in to going with me, and one day she finally said yes. I was so so happy! We had a great time and after that flight she has done a lot of travels. She mostly like to visit big cities. And that’s why my choice of theme ended up in this card. And yes, we have been to London two more times together. Much appreciated time together. ❤️.

Now to the card:

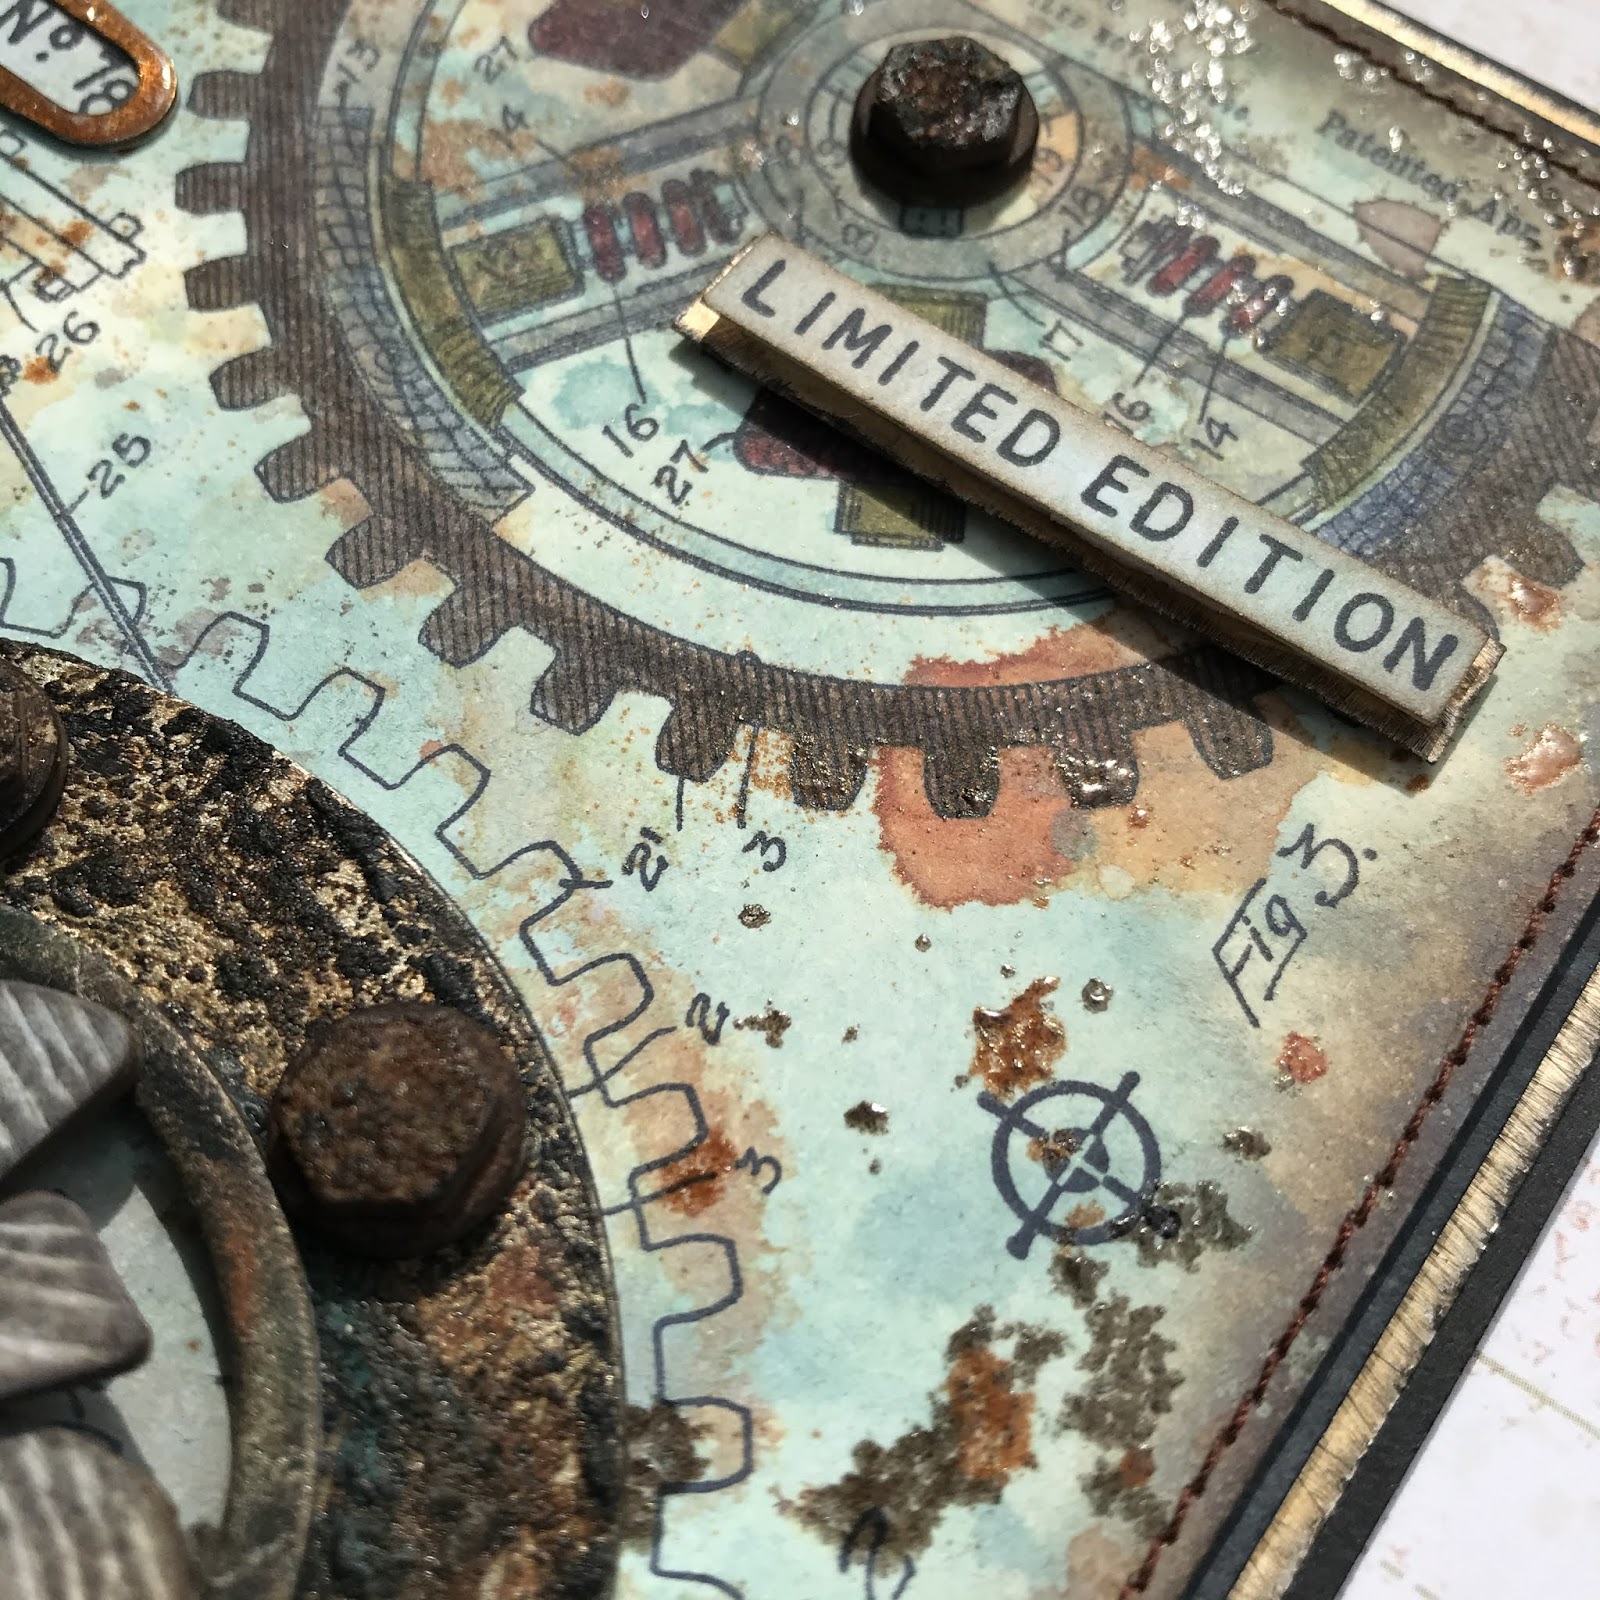
I started with the background. Cutting a card from watercolor paper. Squeezed Distress ink Stormy sky on my Tim Holtz media mat, sprayed it with water and dipped it in Distress ink Stormy sky. Dried between the layers until I was happy with the result. Then I inked a stamp from CMS 397 Faded types, spritzed it with water and then stamped it on the background. This is one of so many techniques that Tim has shown in his FB lives during the last weeks. Then I dried the background again. Then I used Crackle paste through the star stencil from Stamptember 2019. Then I applied Weathered wood embossing glaze on the paste and let it dried completely. When dry I used my embossing gun and heated the glaze. Love this look, that also have been shown in one of Tim’s FB lives. Then I inked the edges with Distress ink in Walnut stain, and stitched around the edges with my sewing machine.

I then cut the city from kraft cardstock with 661804 Cityscape Metropolis die from Sizzix, and sanded all the houses. Then I cut the Destination die 664179 from mixed media heavystock and glazed it with Weathered wood Embossing glace. Then I took a crayon in Walnut stain above the glaze and smudged the crayon in to all small crevices. Another cool technique from Tim.

Then it was time for the suitcases; Sizzix die 664439 Baggage claim.
The brown suitcase is cut from Distress cracked leather paper from Ranger. It is such a cool paper! I used different brown Distress inks, then black Distress paint, and finally Distress crayons in Walnut stain and Rusty hinge to get this look. The corners and buckles are metallic kraft cardstock that I have sanded and inked with Walnut stain Distress ink. Then I cut a tiny tag from Sizzix set 657188. Stamped ”New York” using CMS 108 Travel labels,  then used the new beautiful color Speckeled egg Distress oxide on the background and  colored ”New York” with Fired brick Distress reinker. Then I took a black fine pencil and draw stitches around the edges of the tag. I also inked the edges with Walnut stain Distress ink.
I cut the middle suitcase from mixed media heavystock and used the Textured fade embossing folder. Then inked it with Hickory smoke Distress ink and Distress oxide. Then drag the whole ink pad in Black soot over the surface, and repeated with Rusty hinge Distress ink. Inked the edges with Walnut stain Distress ink. Then I put an idea-ology jump ring and story stick on the handle. To highlight the word travel I used white Distress crayon.
The third suitcase is treated the same way as the globe. The special delivery is an idea-ology ephemera piece
The handles on all the suitcases are inked with Walnut stain and Ground espresso Distress ink, and spritzed with water. All suitcases are glued to chip board to get the thickness.

The tickets behind the suitcases are stamped with CMS 337 Ticket booth and cut with the 662698 die from  media heavystock. Colored with different colors from Distress ink and oxides. Walnut stain Distress ink on all the edges. I have crinkled them to get some dimension. 

The paper dolls are meant to symbolise me and my Mother. The dresses are colored using Weathered wood and Rusty hinge embossing glaze. On the girl I also used Distress crayon in Walnut stain over the glaze. The rest of the dolls are colored with Distress crayons.
The text “go+see+explore” are from stamp set CMS 394 Tiny texts, stamped on mixed media heavystock which is colored with Speckled egg Distress oxide and Walnut stain Distress inked edges.  Then I mounted it on sanded Kraft cardstock on 3D adhesive. 
To symbolise the sun above the city I used an idea-ology milk cap which I sanded and then inked with Walnut stain around the edges and on top of the sanding scratches.
I placed an idea-ology Tiny clip on the pink ticket. I put Rusty hinge embossing glaze on the clip.
I mounted the background on a layer of sanded Kraft cardstock, then on a sanded and inked metallic Kraft cardstock, and finally on a black card blank. 3D adhesive behind every layer for dimension.

This ended up in a veeeery long blog post. But I wanted to describe every detail on this card, because we all know “ it’s all in the details”, right?! 

I will try this card over on Simonsaysstampblog mondaychallenge/ Make your own background. 


Thank you very much for visiting, take care and have a nice weekend. 

/ Susanne.