Blogg

Blogg

tisdag 4 april 2023

Purple card

Hello and welcome, 

This is another take of an Ideaology card that I puplished two days ago. This time I went for a purple color scheme. 


I started with the background. I cut a piece from one of the beautiful Backdrops #5 papers, and teared a piece of collage paper - Palette. I glued the collage paper to the background with Distress collage medium under and on top of the paper. Then I inked the edge with Distress ink Ground espresso. I stitched the edges with my sewing machine. 


I stamped a few images from CMS396 Field notes on Watercolor paper and colored them with Distress pencils. Inked the edges and then stitched the edges on one with my sewing machine. 

I also used a collage strip, which I also stitched on with my sewing machine. All edges are inked with Ground espresso DI. 


I colored a Paper doll - portrait with Distress pencils. 


The lilac flower on the left of the paper doll is fuzzy cut from a Backdrop #5 paper. 


I used a Mini paper clip on top of the collage strip. I also inked a Quote chip label with Ground espresso DI. All pieces are adhered to the background with 3D foam accept from the Quote chip, which I glued with Distress collage medium. 

The card is mounted to a white card blank. The edges on the card blank is inked with Dusty concord DI. 

Thank you for visiting my blog, 

/Susanne


söndag 2 april 2023

“Wish” - a little magic can take you a long way

Hello and welcome, 

 Today I will share a card with some old and new awesome Ideaology pieces from Tim Holtz. 

I started with a piece of water color paper. Mounted CMS396 Field notes stamp set in to my stamp platform and inked it with Archival ink in Black soot. Then stamped. I then inked my craft sheet with Frayed burlap, spritzed some water and inked the card. Dried between layers until happy. 

Then I used my Distress pencils and colored some of the stamped images. Then I inked the edges with Ground espresso DI, and stitched with my sewing machine. 


Then I choosed a Collage strip and stitched around the edges and zip zaged with my sewing machine straight over the strip. Inked the edges with Ground espresso DI. (I did that with all the Ideaology pieces). I also zig zaged on the Flash card and on a piece of Ephemera - Emporium. 

I glued the Ephemera piece to the background and then adhered the collage strip and “wish” card with 3D foam. Then I pulled off a piece of collage paper - Palette and adhered it with Distress collage medium. I cut a ticket from Ephemera - Emporium in two, and crinkled it, inked it and fastened with a Mini paper clip on the collage strip.


I colored some areas on the Paper doll - Portraits with my Distress pencils. And adhered her to the card with 3D foam. I also stitched on the paper doll with my sewing machine. 


I fuzzy cut a flower from Backdrops #5 and glued it under a Quote chips label. 


At the moment I am on a place with limited supplies, so when I get to my craft room I will mount this card front to some more layers. 

Thank you for visiting, 

/Susanne


lördag 1 april 2023

Another bunny

Hello and welcome, 

This is another bunny, made exactly the same way as my bunny in my last blogpost, but in cool colors. 

I made this one a male bunny. And used the cool colors on the collage paper. 

On this one I used the dotted stencil. 

The “Happy Easter” stamp.


I will try this in the “Stencil it” challenge over at Simon says stamp Monday challenge

Thank you very much for visiting my blog, 

/Susanne 


fredag 31 mars 2023

Hippity hoppity!

Hello and welcome, 

Today I have a new easter bunny for you. This stamp from Tim Holtz is so cool! 


I started to cut a piece of water color paper. Inked the background with Distress ink in Mustard seed, Wild honey. Then I used Ground espresso and the plaid stencil. 
I inked the edges with Ground espresso DI.


Then I teared some pieces of Collage paper “Palette”. I loooove that paper. I mostly used the warm colors from the palette. Then I adhered the collage paper with Distress Collage medium, both under and above the paper. (Be very careful when you apply the Collage medium to the stenciled background, because you can smudge the ink). One tip is to use Archival ink instead of Distress ink with the stencil). 

I also splattered the background with black acrylic paint. 

Then I stamped the bunny on water color paper and colored it with Distress pencils. Fuzzy cut. I stamped the bow twice, and colored. I glued the second bow a little offset on the first bow. 


I stamped the text with Black soot Archival ink on the background. Using my stamp platform. 
I used 3D foam to adhere the bunny. 


I mounted my background to a piece from the Backdrop volume #5, inked the edges with Ground espresso DI.


I will try this card in the Stencil it challenge over at Simon Says stamp Monday challenge

Hope you are ready for easter. 🐇🐰🐥

Welcome tomorrow for another bunny 🐰

/Susanne

måndag 13 mars 2023

Happy Easter tag card

Hello everyone, 

Today I will show a tag card which is made with Tim Holtz products. I’m so happy that this stamp set arrived to Sweden. It is a special set for Joann craft stores in USA. I bought my set from Simon says stamp. (I have tried to buy stamps from USA before and some didn’t arrive, they were stopped in the Swedish customs). 

But now to today’s make.


I started with a yellow piece of Ideaology Kraftstock. Cut a tag with my favourite die, Tag and bookplate. Then I used the 665768 3D embossing folder Woven on about 2/3 of the tag. Sanded the whole tag and inked the embossed areas and edges with Ground espresso Distress ink. 


Then I stamped “Happy Easter” with white acrylic paint. I used Tim’s mini brayer to applicate the color on to the stamp. Be quick to wash off the paint after stamping. 
Then I stamped again, this time a little bit offset and with Black soot Archival ink. I used my stamping platform for all the stamping. 


I stamped the rabbit on watercolor paper and colored it with Distress ink’s and Distress pencils. 


Then I fuzzy cut the image. I inked the edges with Black soot DI. Then used 3D foam under the rabbit to adhere it to the tag. 


I cut a piece of grey cardstock, inked the edges with Ground espresso DI and adhered the tag with 3D foam. Then I cut a piece of Ideaology Blackout, sanded and used as card blank. 3D foam between all layers. 
I used a piece of Linen ribbon (which I inked with Ground espresso DI) at the top of the tag. 
Used a thin black pen and wrote a frame around the whole tag.
In each corner I used hardwear heads that I painted with acrylic paint in transparent yellow iron oxide, sanded and adhered with Distress collage medium. 

That’s it! 

I will try this card over at Simon says stamp Monday challenge - Emboss it. 

Thanks for visiting and have a nice week!

/ Susanne 

torsdag 16 februari 2023

Valentine 2023

Hello and welcome, 

Time to show this years Valentine card. ❤️. I made this card for my fabulous husband. We like Disney and I know my husband likes texture on his card. This card is made with Tim Holtz products accept from the Mickey stamp. (That is a very old EK Success clear stamp. 


I cut a piece of water color cardstock  and then painted it with Tinting base (from Decoart). Dried with heat tool. Then I inked the 3D embossing folder Cobblestone #2 with Distress Oxide Lost shadow. Then run it through my Big shot. Then I used Black soot ink mixed with water and used a paint brush to apply the “wash”. Then I inked the edges with Lost shadow oxide. Then I splattered some Black ink/water on the background with a paint brush.


Next is the filefolder which I diecut with 665930 Specimen from water color cardstock. Inked my craft mat with Lost shadow ink and oxide sprayed some water and dipped the folder into the ink a couple of times. Dried between layers with my heat tool. Then I used Crackle paste through the THS017 Heart layering stencil. Let dry. Then I used Aged mahogany and Fired brick Oxide blended with water, applied with a paint brush. I also splattered the background with the same inks with a paint brush. Inked the edges with Lost shadow ink. “Love” is cut with the Specimen set from red sanded Kraftstock. I used two of the small words to get the letters for love. 


Time for the focal point on the card. I cut the frame from sanded red Kraftstock with the same die set as mentioned above. I love this frame! Then I stamped Mickey on Watercolor paper and colored him with Distress inks and reinker. Then I mounted the “portrait” in to the frame and secured with 4 Mini fasteners in each corner. Finished it off with a Mini paper clip. 


I diecut the big “love” with 664416 Heartbeat from red sanded Kraftstock and some grey cardstock. Then I glued them together.


Now it’s time to put the card together. I found a red sanded Kraftstock piece which I glued in the top left corner on the filefolder, and also used a Mini fastener. Then used 3D foam between the filefolder and background. 
Then I sanded a piece of Blackout Kraftstock and layered behind the background, also using 3D foam. Then I made a card blank from grey cardstock, which I inked the edges on with Black soot Distress ink. 

I will try this card in a challenge over at Simon says stamp Monday challenge Frame it. 

Thank you so much for visiting me here, 

/Susanne 


tisdag 3 januari 2023

2023 - Peace tag

Hello and Happy New Year!

Let’s hope for a good year! 

I started the year to make a tag about peace. 


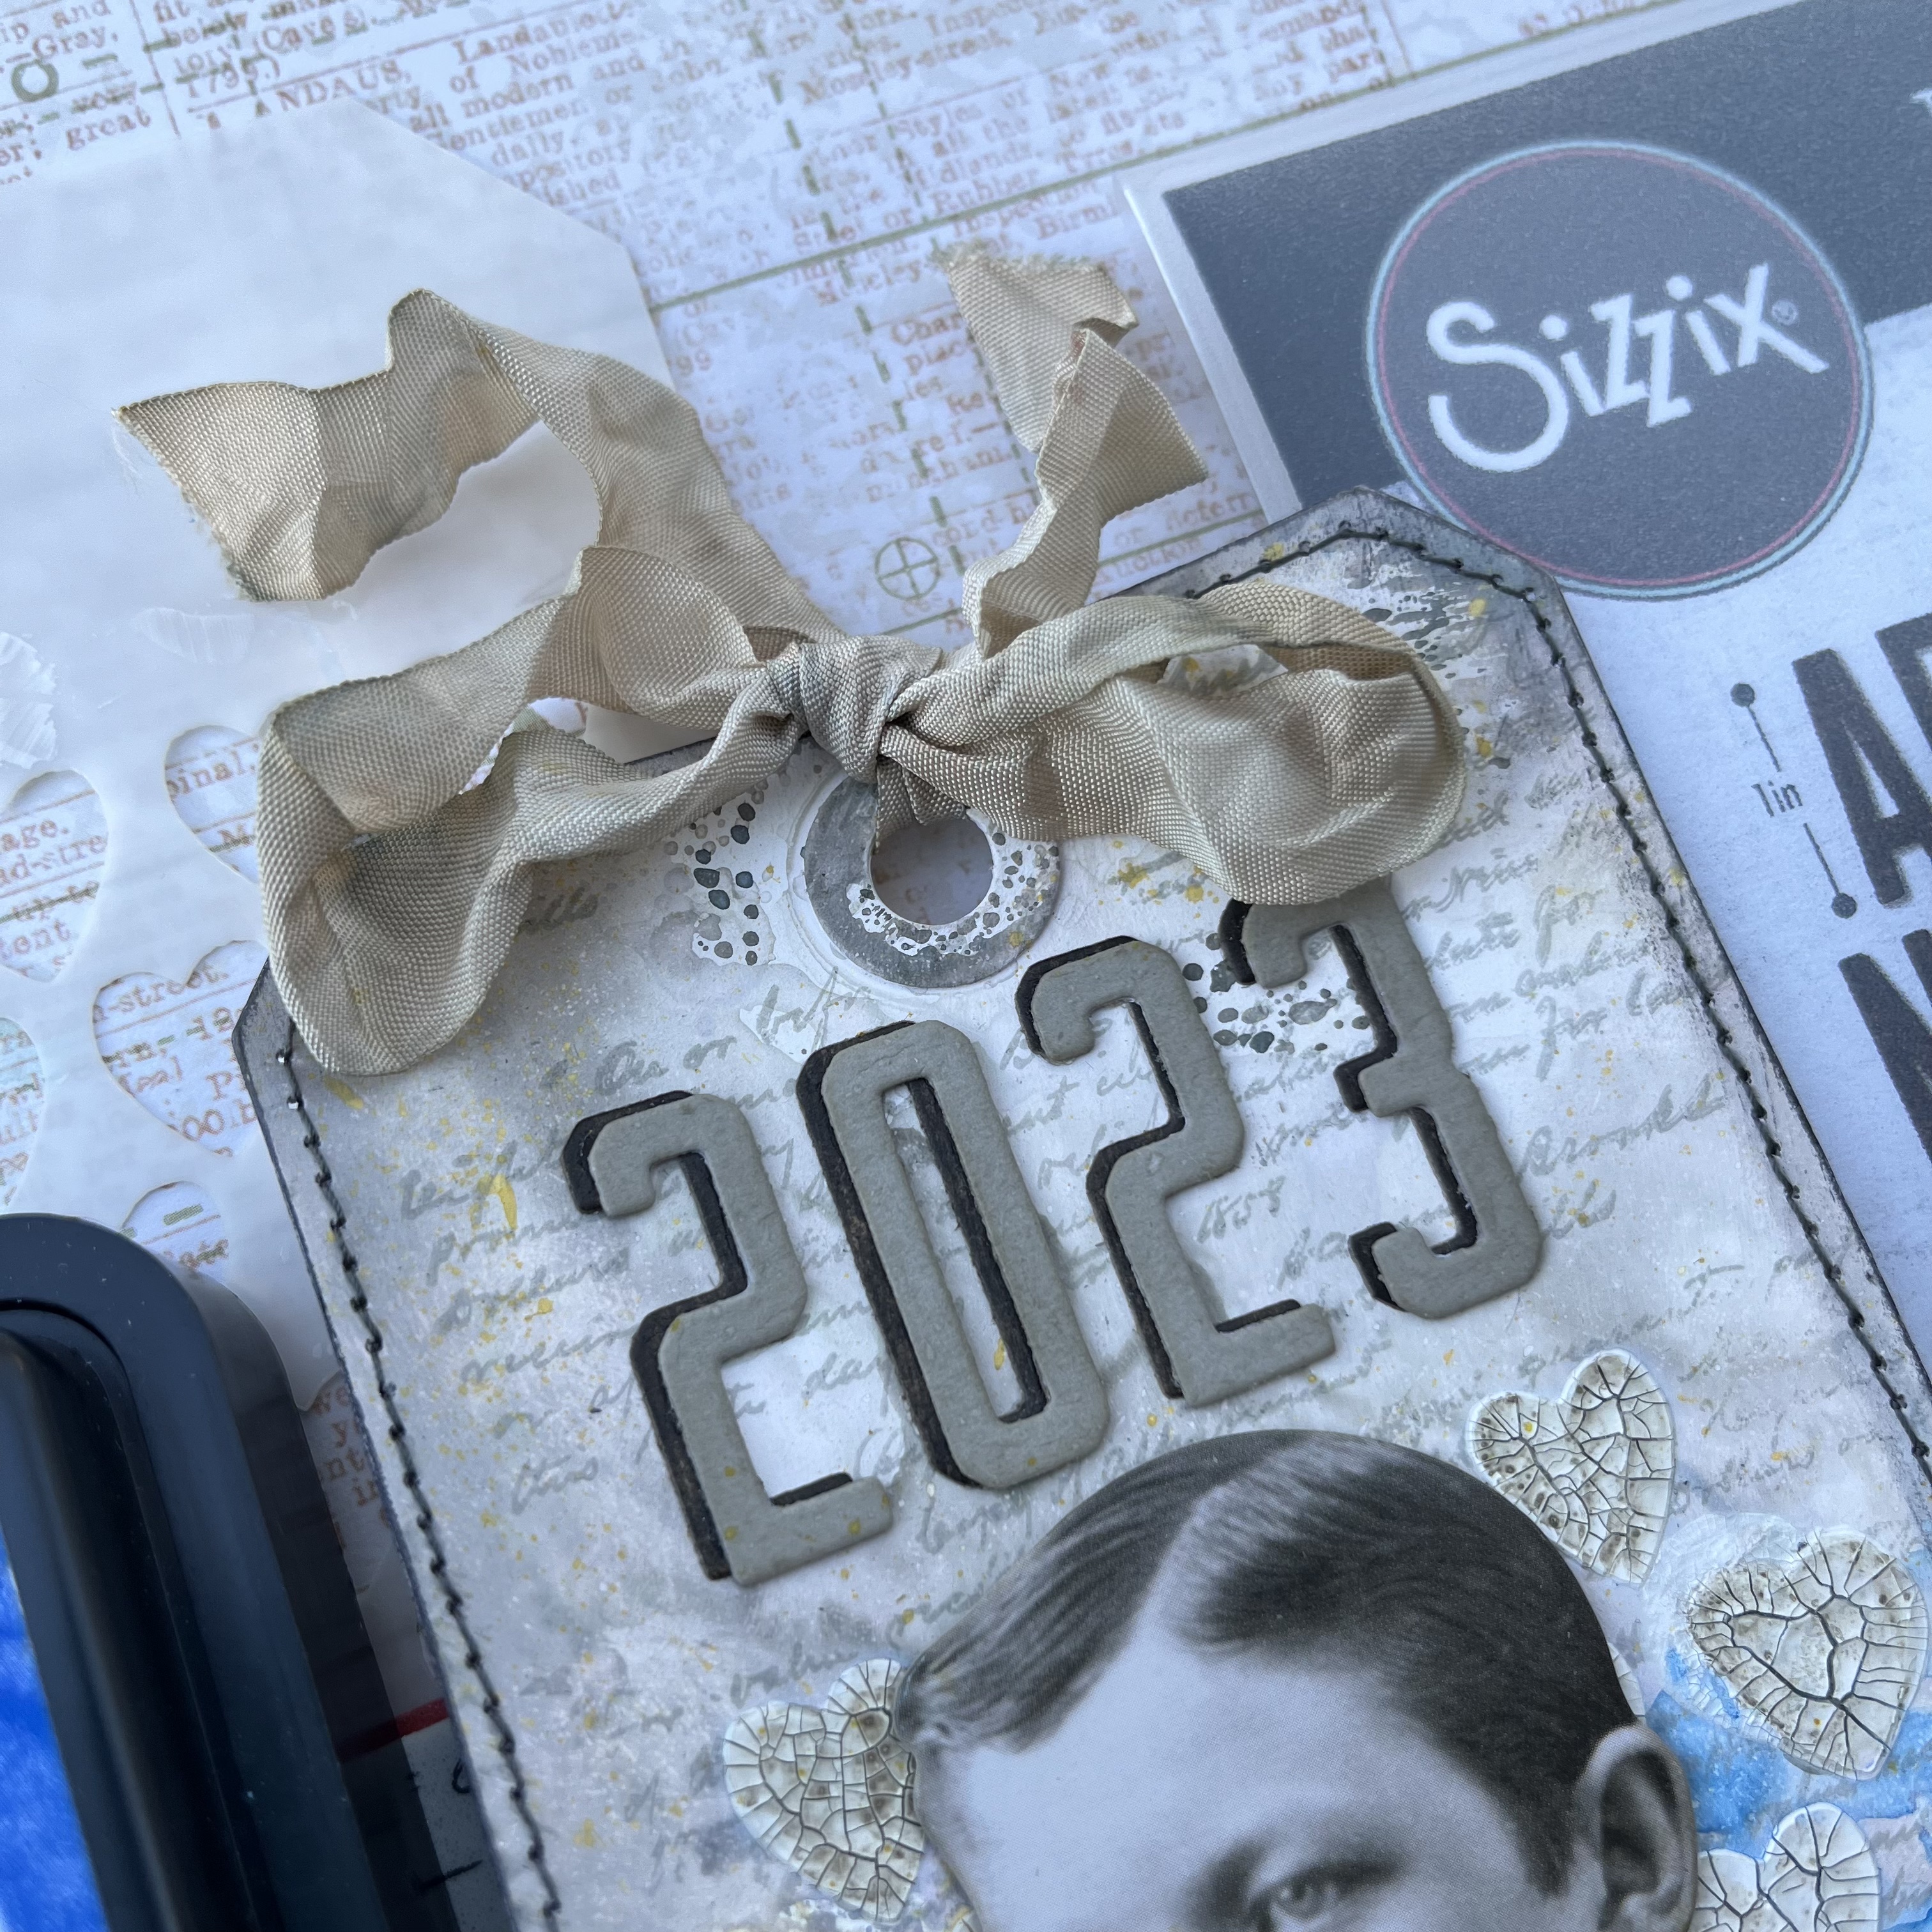
I started to cut a tag from White heavystock. Used tinting base and let it dry. Then I inked my craft mat with Pumice stone Distress ink, spritzed with water and dipped the tag in the ink. Then heated. Repeated this until happy. Then I stamped the text stamp from CMS328 Entomology with Hickory smoke Archival ink. 


Then I stitched around the edges with my sewing machine. I also inked around the edges with Pumice stone DI and Black soot Archival ink. Then I used the “peace” stencil from THEST 003 Element stencils Christmas, and some Grit paste. Let air dry.
When dry, I placed the stencil back on the word and used my Ink blending tool and DI Pumice stone to get the Grit paste colored. 
Then I wrote with a thin pen around the word, and soften it out with a lightly watered paint brush. 
I also used the THS017 Hearts layering stencil, with some Crackle paste. Let air dry. 


On the hearts I used Distress ink in Prize ribbon on the right side of the tag. On the left side I used Mustard seed Distress reinker and water. When dried, I used Distress crayon in Walnut stain and some water on the hearts to get the crackles more visible. I spritzed some yellow drips (reinker and water mixed) on the whole background. 


I cut out “2023” from both White heavystock and black sanded Kraftstock with 665924 Alphanumeric Theory. I inked the white pieces with Pumice stone DI. Then I glued the black pieces behind the grey, a little bit offset as a shadow. 


I made a bow from seam binding band which I inked with Pumice stone DI. 


I used a young boy from Paper dolls portraits as the main focal point on this tag. I think it looks like he is dreaming of peace. Who isn’t?


I will try this tag over at Simon says stamp blog Monday challenge
- Light up the new year. And what better way to light up the new year than to wish for peace on earth. 

Thank you for visiting my blog today! 

/Susanne